
Records
Records is the home for voice recordings from site walks, client calls and instructions. Upload or record audio once, then use the transcript, summary and Bee chat to turn spoken notes into an auditable work record.
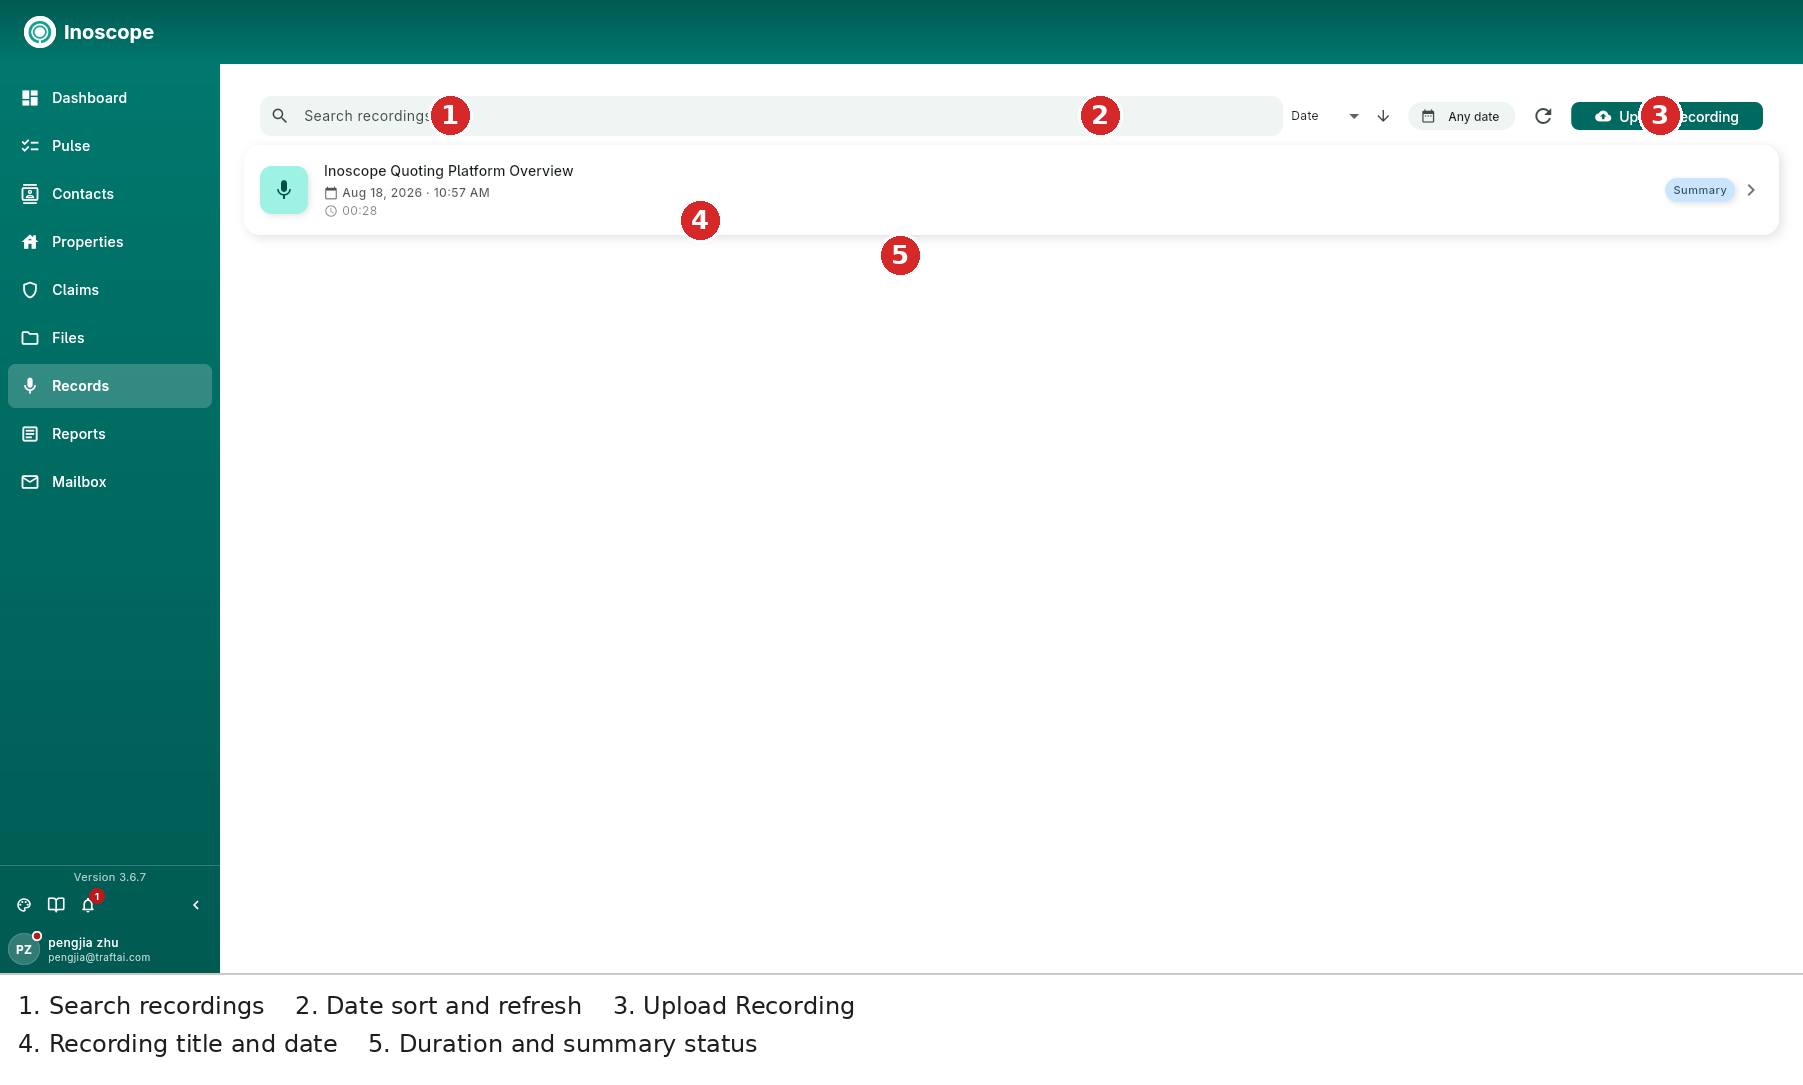
- Search recordings — searches recording titles and indexed transcripts.
- Date / direction / refresh — sort by date, choose a date range, reverse the order, or refresh the list.
- Upload Recording — import audio recorded outside Inoscope.
- Recording row — title, date/time, duration and processing state such as Summary.
Recordings do not need to be attached immediately
Keep a recording in Records first. Attach it to an assessment later with From Records, or ask Bee about it from the recording detail page.
Recording Detail
Open a recording to get an audio player, generated summary, transcript and a Bee workspace beside the record.
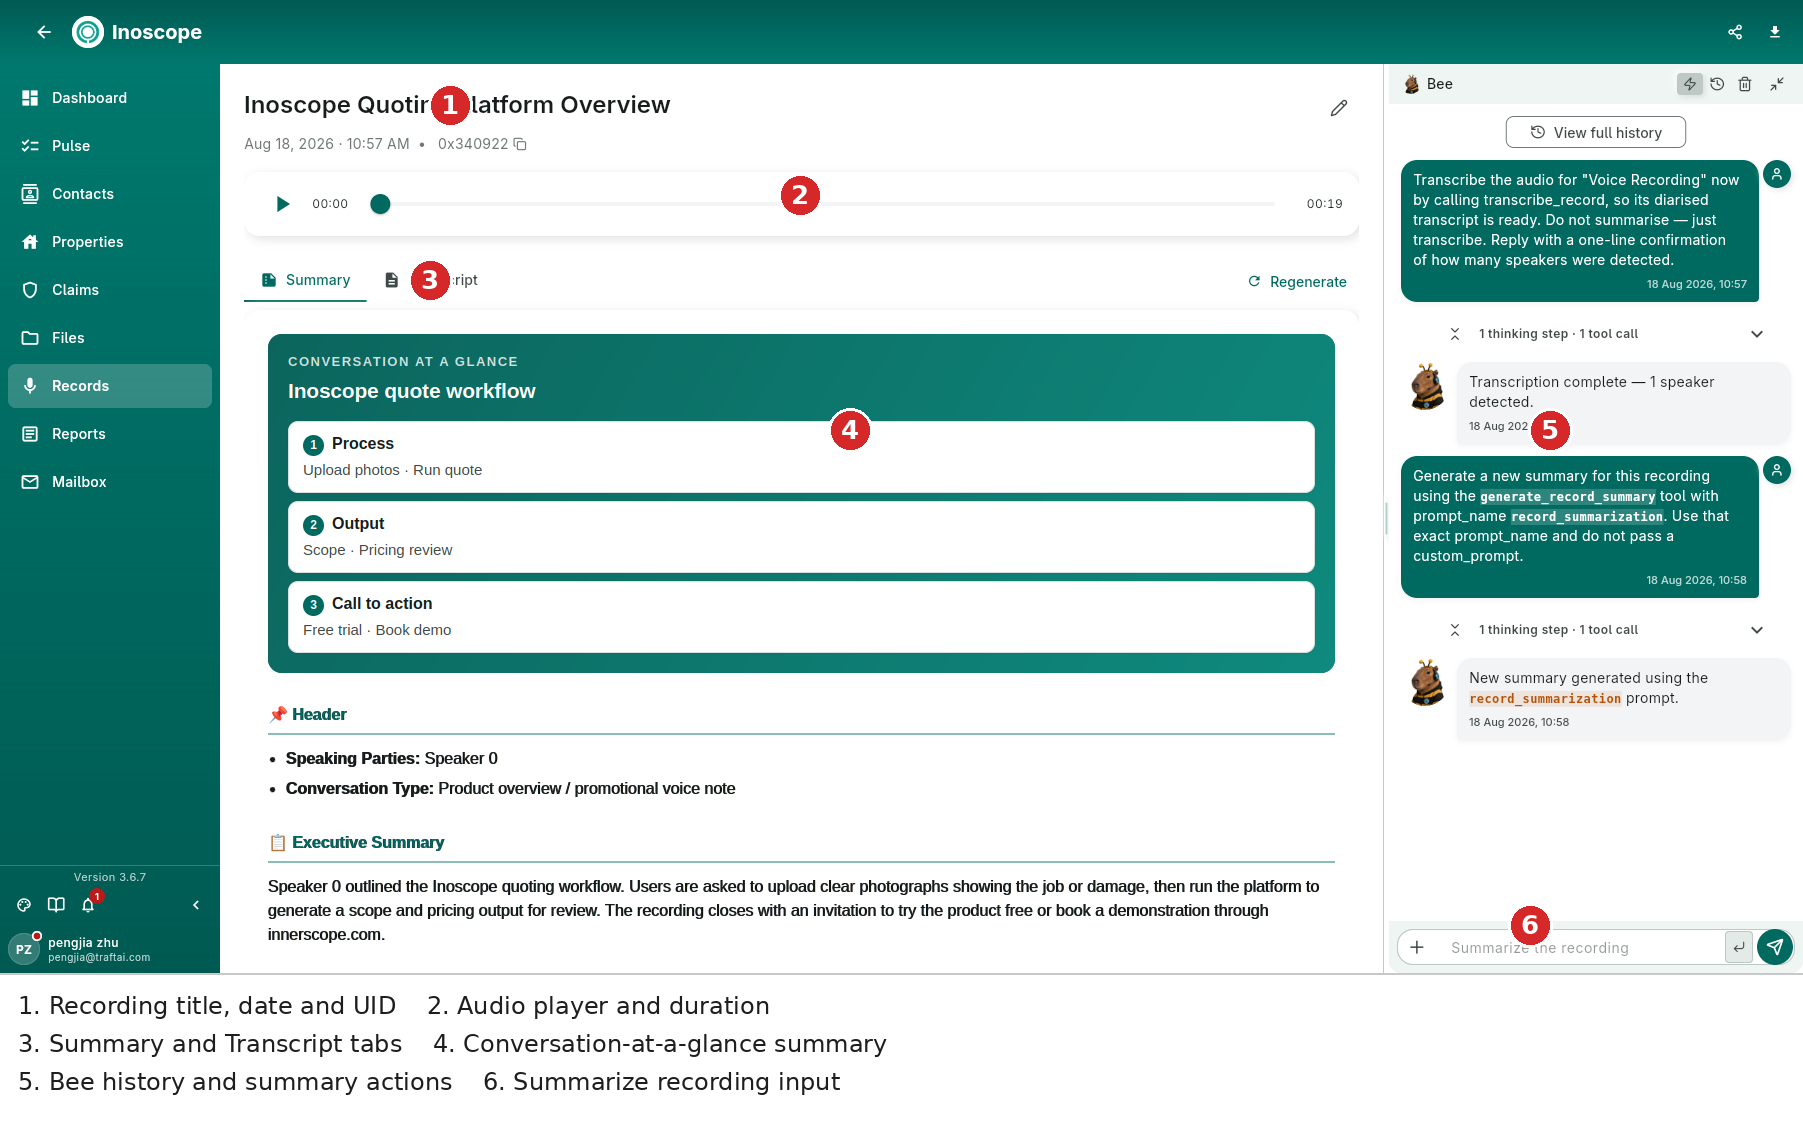
- Header — title, date/time, UID, edit, share and download actions.
- Audio player — play/pause and scrub through the recording; the duration remains visible while reviewing the text.
- Summary / Transcript — switch between the generated summary and the diarised transcript. Regenerate creates a fresh summary.
- Conversation at a glance — a structured mind-map-style summary. The example separates Process, Output and Call to action, followed by header facts and an executive summary.
- Bee history — transcription and summary tool calls are retained alongside the record. This makes it possible to see when transcription completed and when a summary was regenerated.
- Summarize the recording — ask Bee follow-up questions without leaving the record.
Summary Structure
A generated summary can include:
- Header — speaking parties and conversation type.
- Executive Summary — the concise narrative.
- Conversation at a glance — numbered topics and relationships.
- Additional sections extracted from the recording, depending on the content.
Transcript
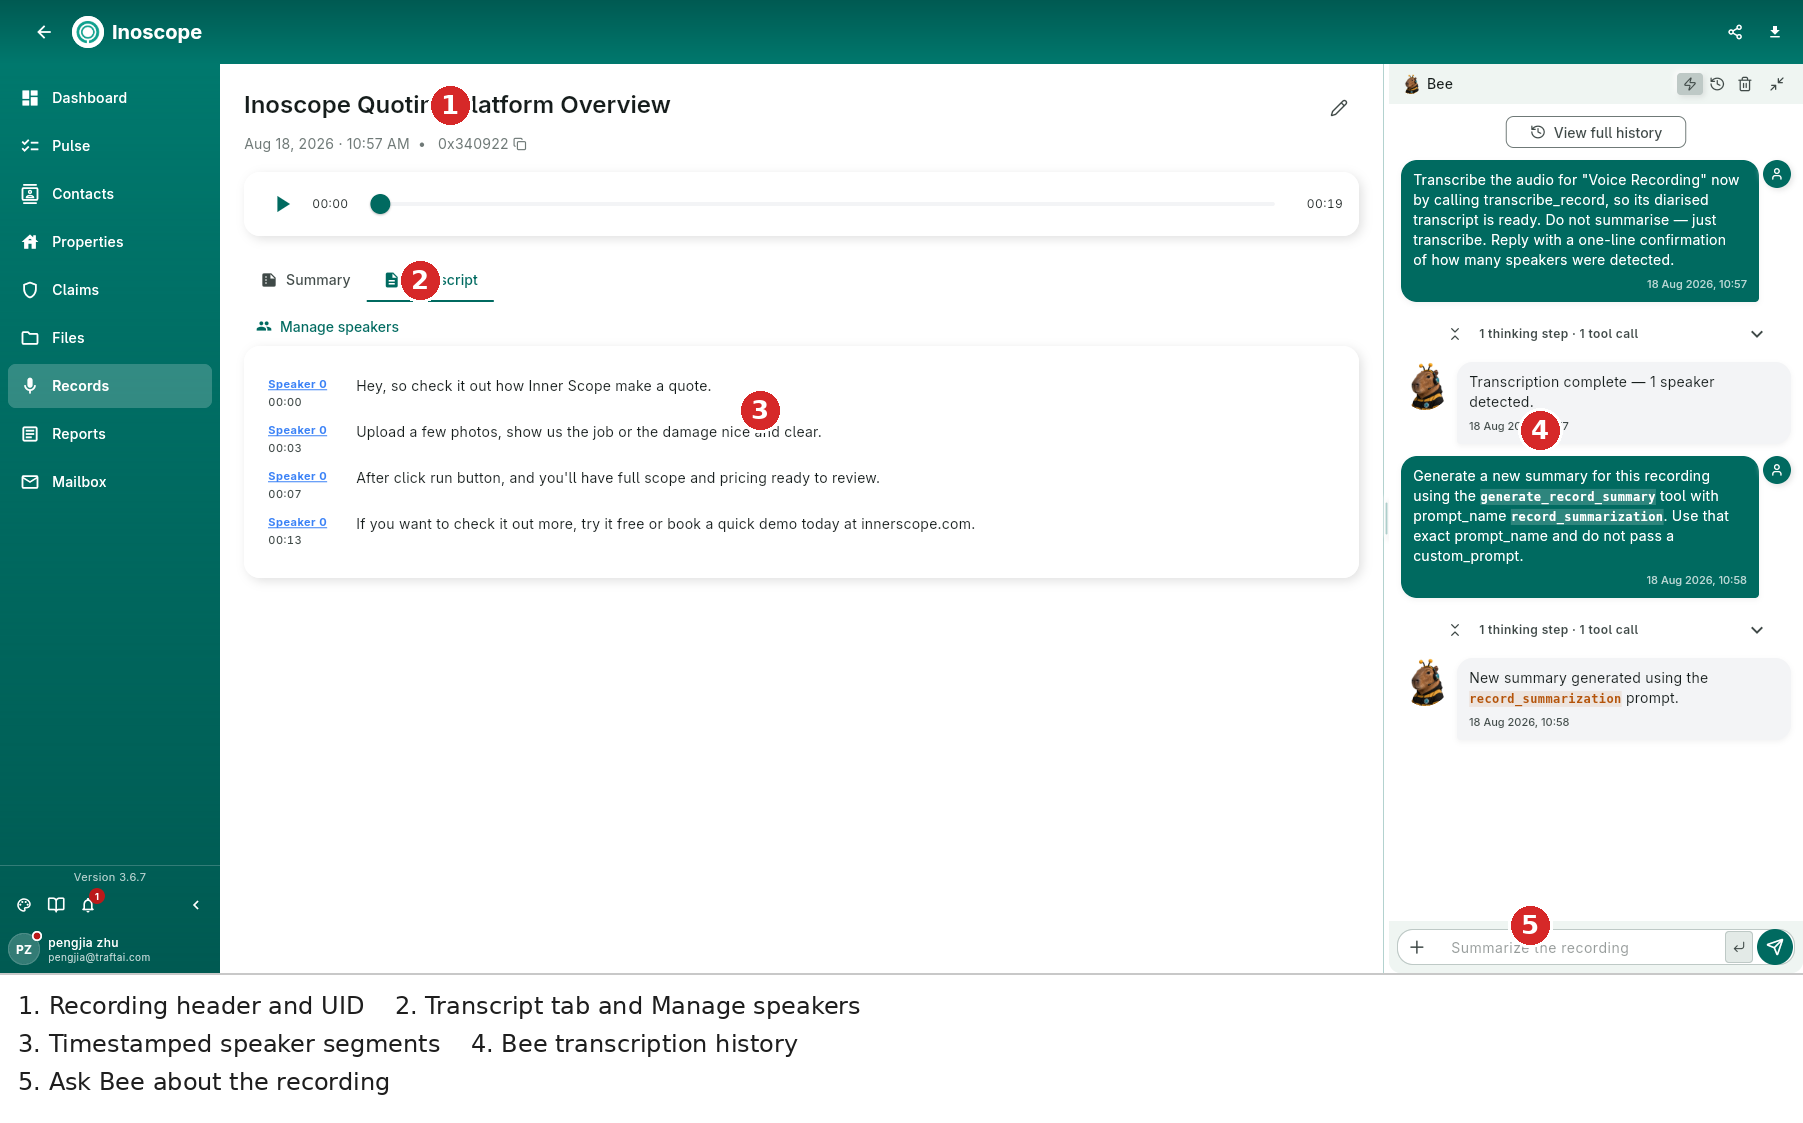
The Transcript tab shows each segment with its speaker label and timestamp. Use Manage speakers to correct speaker names before relying on the transcript in a report or scope. Each segment remains linked to its time in the audio, so a reviewer can return to the original words.
Bee can transcribe, summarise and answer questions about the same recording from the docked chat. The conversation history remains visible, including the tools used and their result messages.
Recording Safely (3.6.6)
- Audio stays on the device until the server accepts it.
- A failed save offers Retry instead of silently losing the recording.
- Starting a new recording does not overwrite one waiting to upload.
- Discarding requires confirmation.
- Upload continues when switching apps; waiting recordings upload in the background.
- If compression is unavailable, the original recording is retained and uploaded uncompressed.
Recordings are transcribed in full after upload. On-device live transcription was removed in 3.6.6; iPhone iOS 26+ can still show its built-in live transcript while recording.
Use a Recording in an Assessment
- Open an assessment's Files tab.
- Choose From Records.
- Select the recording and attach it.
- Ask Bee to extract observations, scope, quantities or follow-up actions from the transcript.
See Files and Chat Agent.