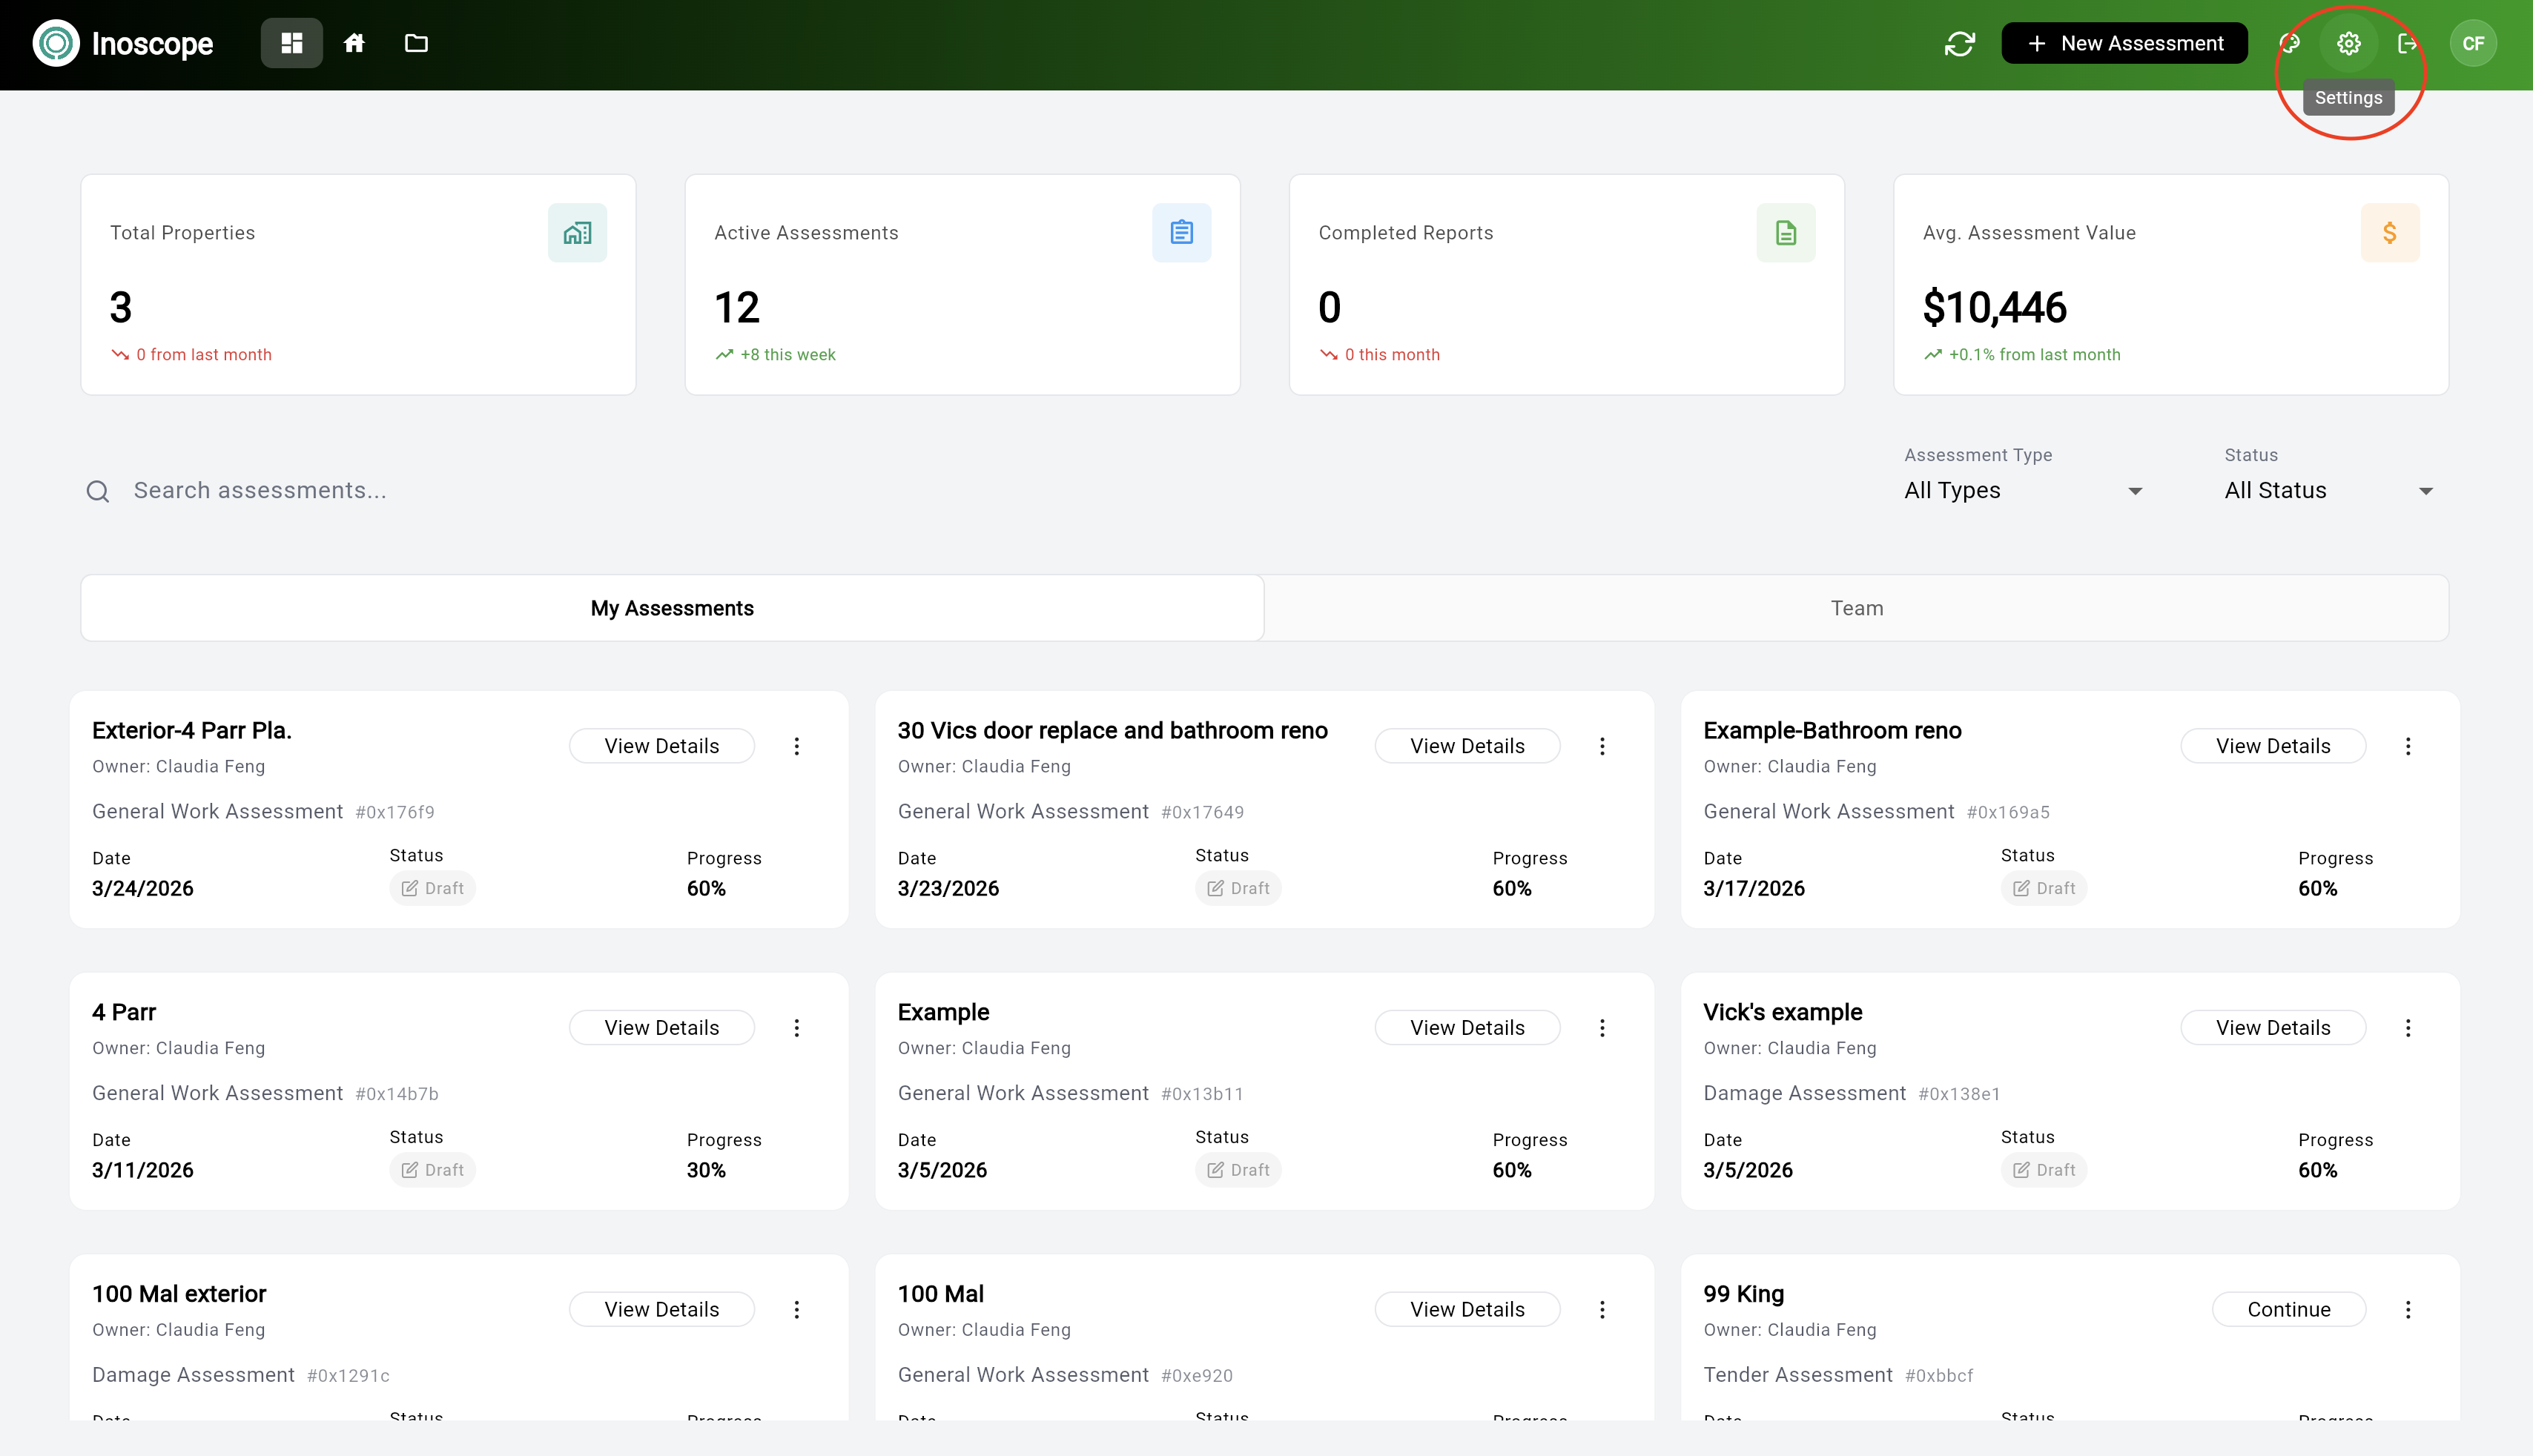
Settings
Access Settings by clicking the gear icon (⚙) in the top-right header.
Settings tabs: Rate Calibration, Memory, Users (visible when you belong to a company), Invites, Payments, Company, Integrations, Security, UI, About.

Profile Settings
Click the user avatar (top-right corner, next to the settings icon) to open the Profile Settings dialog.
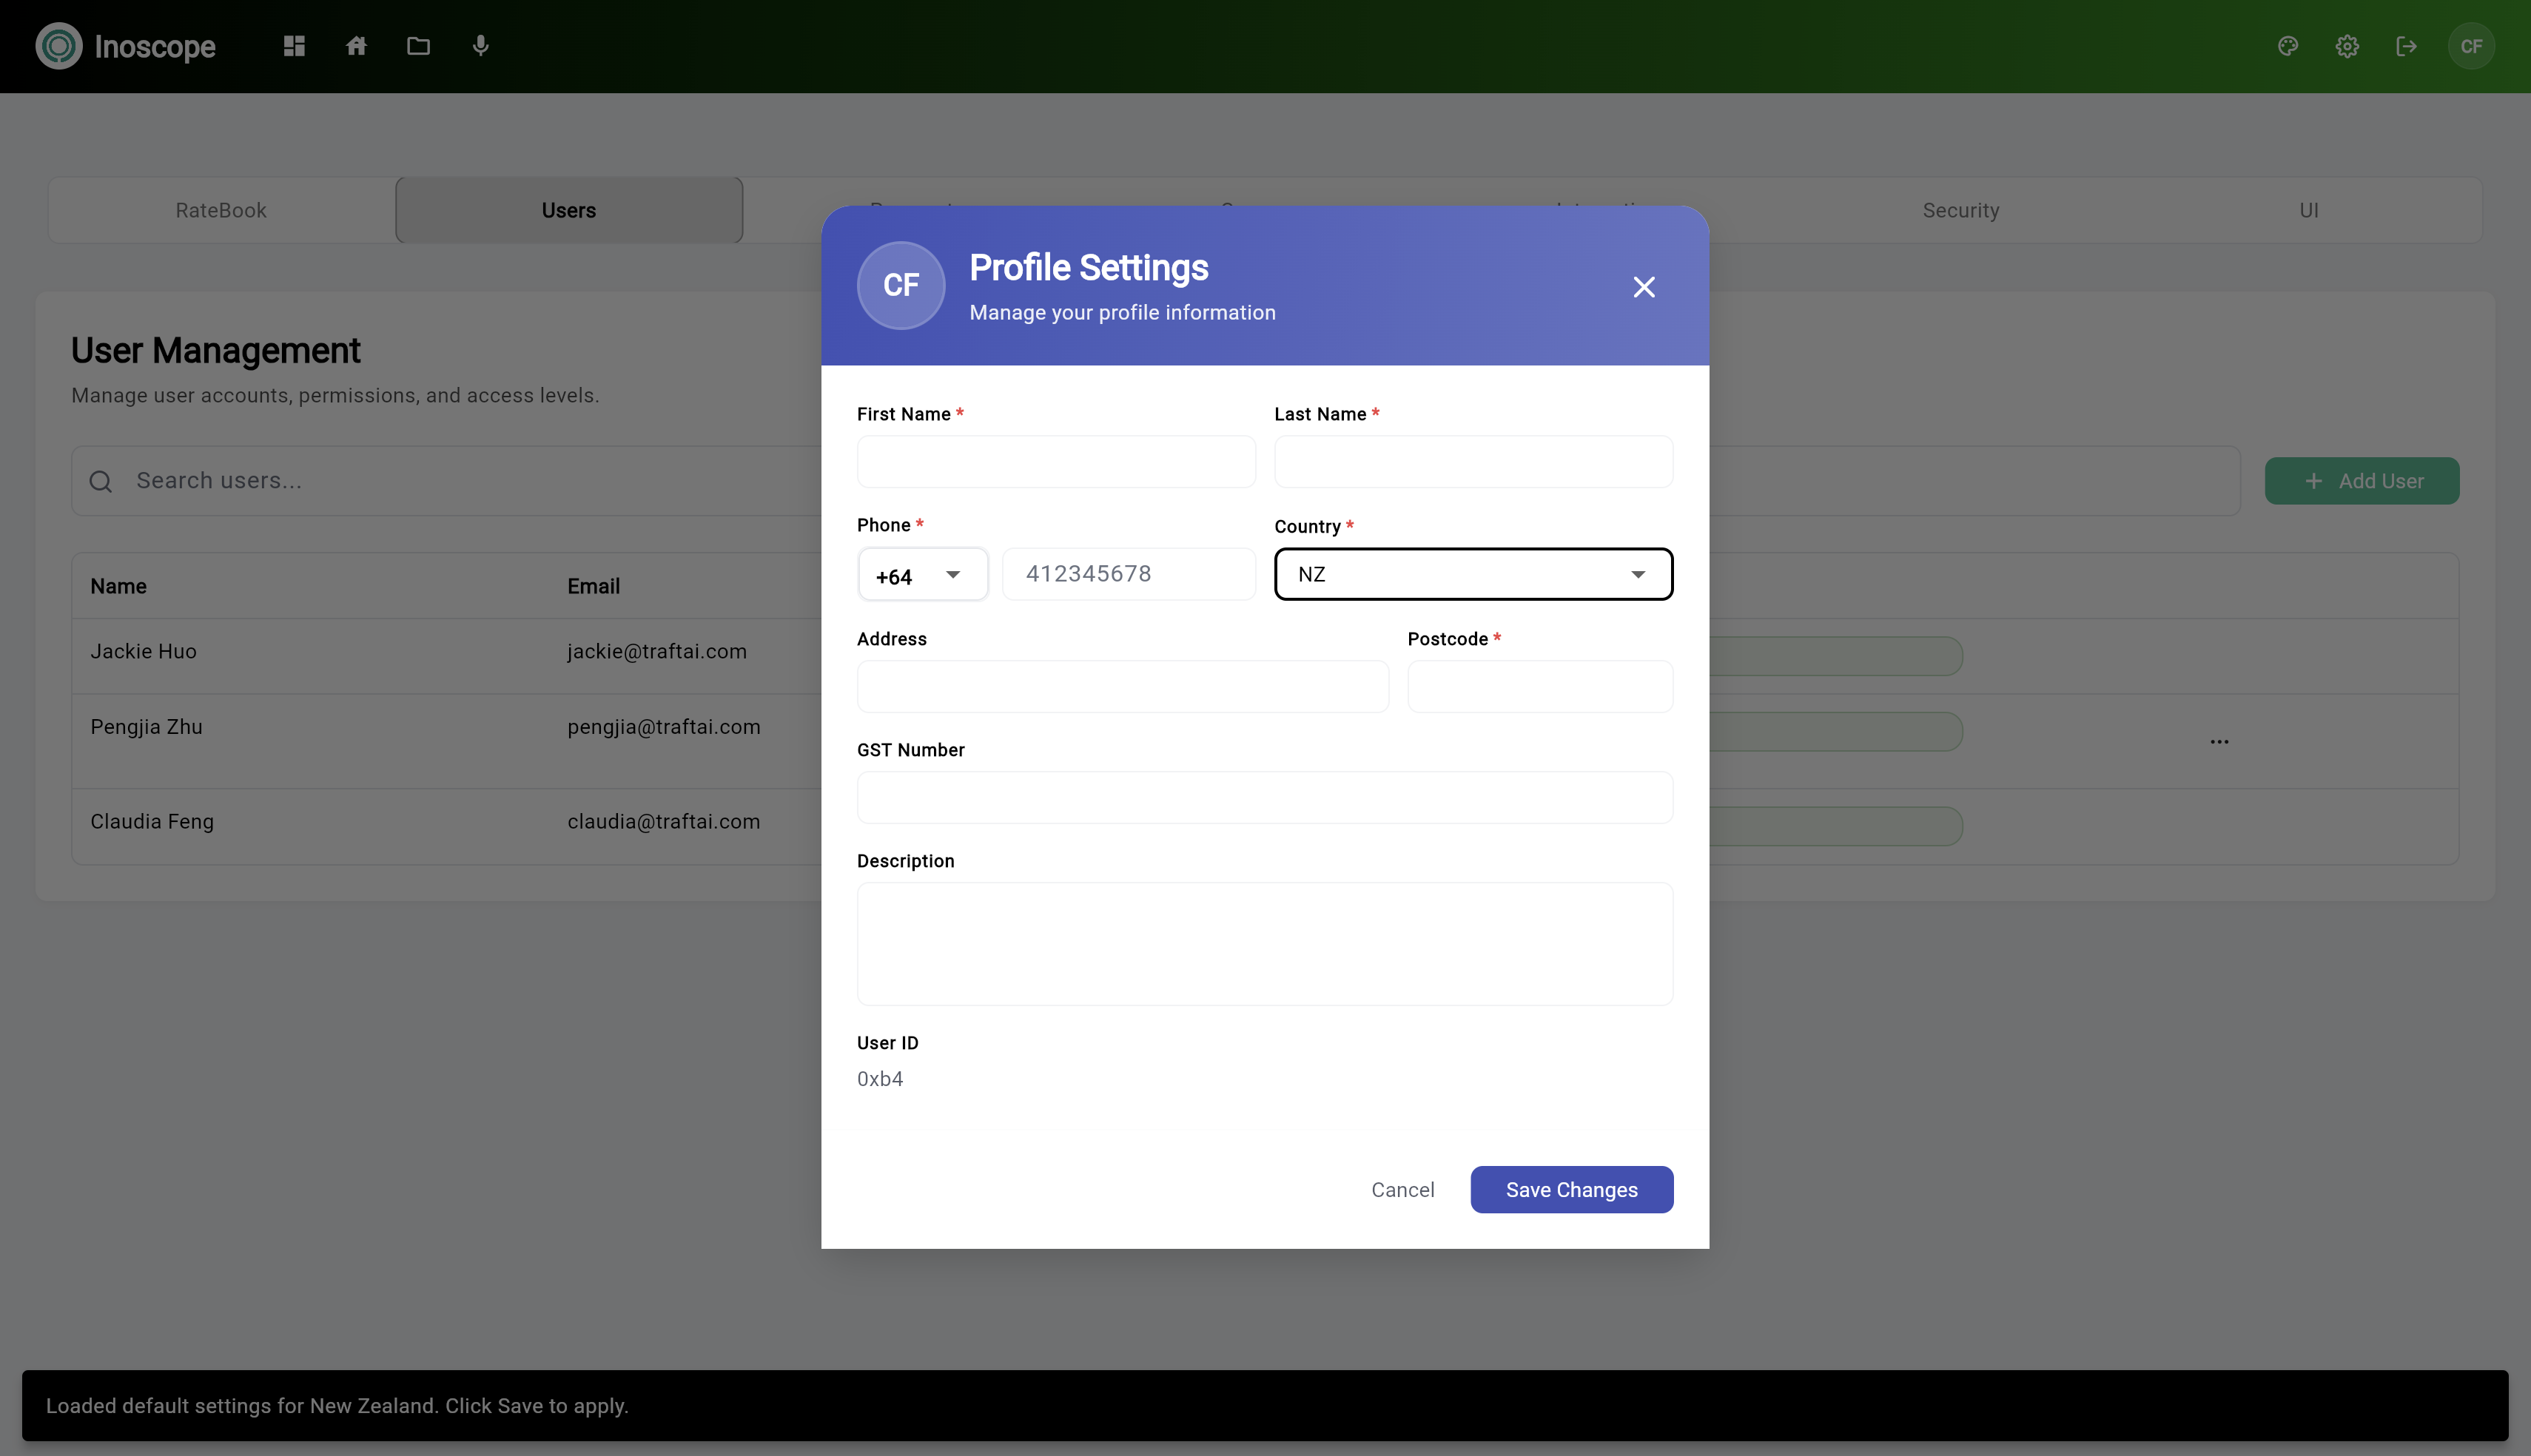
| Field | Description |
|---|---|
| First Name / Last Name | Your display name across the app |
| Phone | Your contact number (with country code) |
| Country | Your country (used for tax and address defaults) |
| Address / Postcode | Your address details |
| GST Number | Tax registration number (if applicable) |
| Description | Optional bio or role description |
Click Save Changes to apply.
Rate Calibration
Manage your product catalogue and pricing for use in line items. Inoscope uses these rates whenever Bee prices a damage repair, work scope, or tender line item — so a well-calibrated rate book is what drives accurate, opinionated pricing.
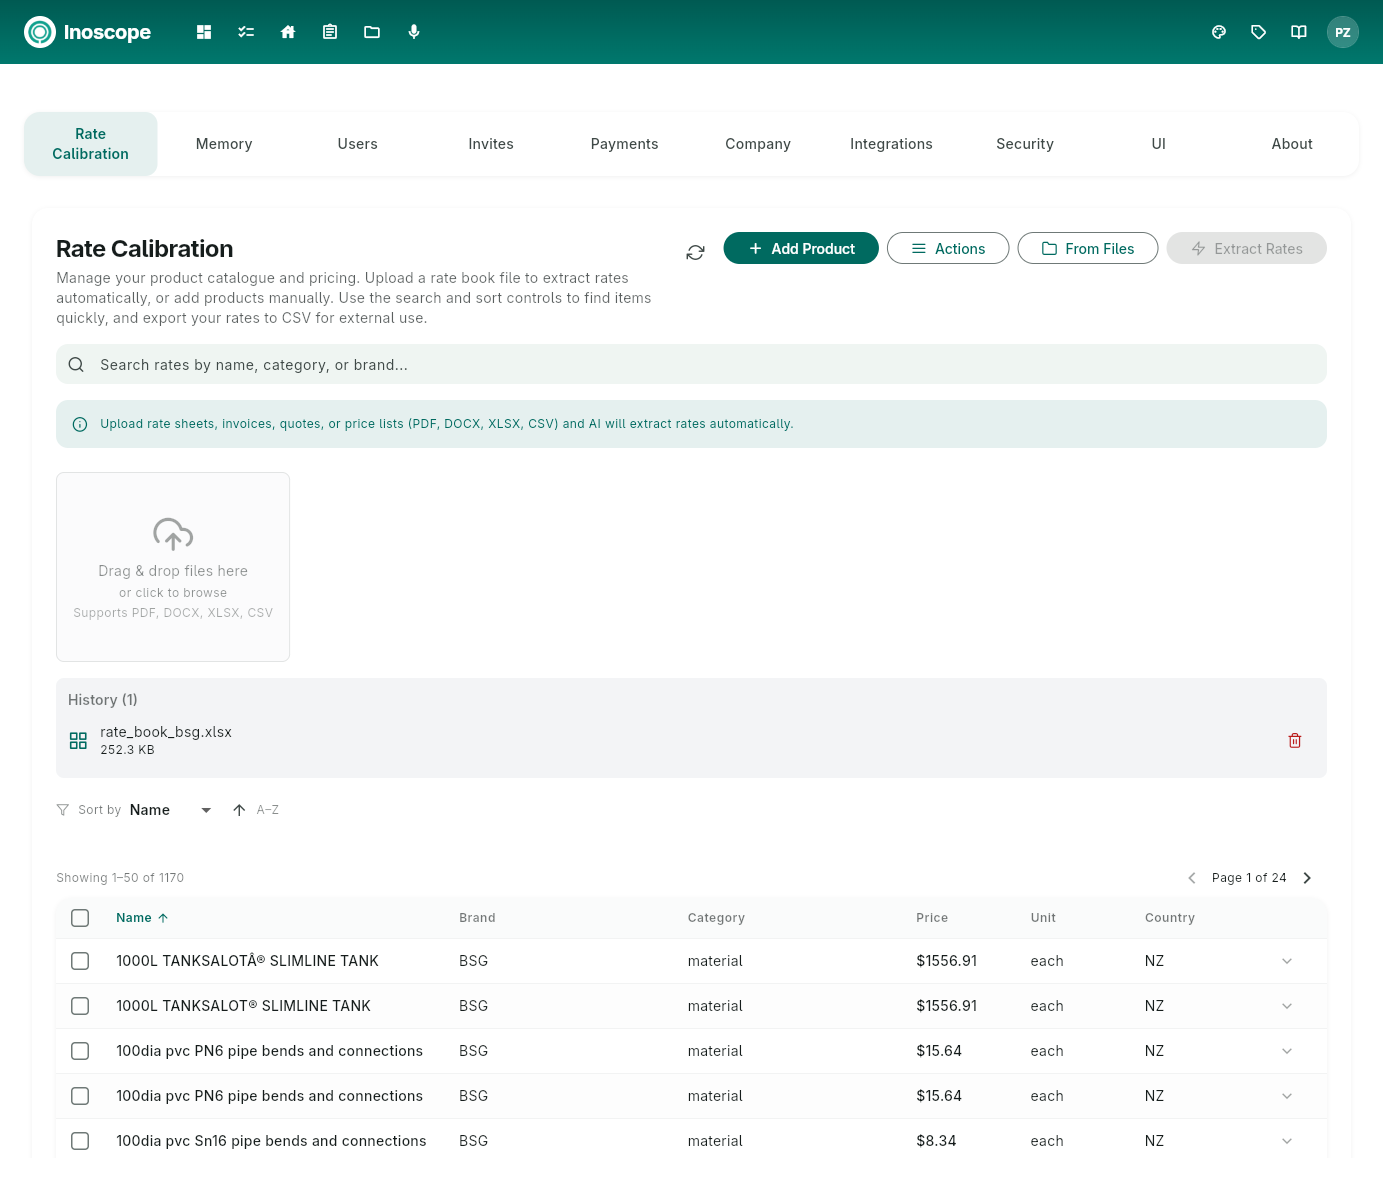
Adding rates
| Control | What it does |
|---|---|
| Drag & drop / click to browse | Upload PDF, DOCX, XLSX, or CSV rate sheets, invoices, quotes, or price lists. Files appear under History once uploaded. |
| + Add Product | Manually add a single product with name, brand, category, price, unit, and country. |
| From Files | Pick rate documents already attached to the company file library. |
| Extract Rates | Trigger AI extraction across the uploaded rate documents. New rates are deduplicated against existing entries (case-insensitive name match within ±10% price tolerance). |
Browsing and managing the catalogue
- Search bar — filter by name, category, or brand.
- Sort by — sort the table by Name, Price, Brand, Category, or Unit, ascending or descending.
- Actions — bulk operations on selected rows (export to CSV, delete selected).
- History — list of source documents that contributed rates, with the ability to remove the document and its extracted rates.
The rate table shows: Name, Brand, Category, Price, Unit, Country. Each row expands (▾) to reveal description, specifications, and the citation back to the source document and row.
Custom rates appear in line item search whenever you add items to an assessment, and Bee uses them automatically when it prices line items autonomously.
Tip: Bee remembers what it learned during each calibration run in Memory (see below) — extraction date, source file, total rates, currency, and pricing basis — so future Bee actions stay consistent with your catalogue.
Memory
Memory lets you see and edit what Bee remembers about you, your company, and individual assessments. Bee uses these notes whenever it builds scope, prices line items, or answers questions, so adjusting Memory is the most direct way to steer Bee's behaviour.
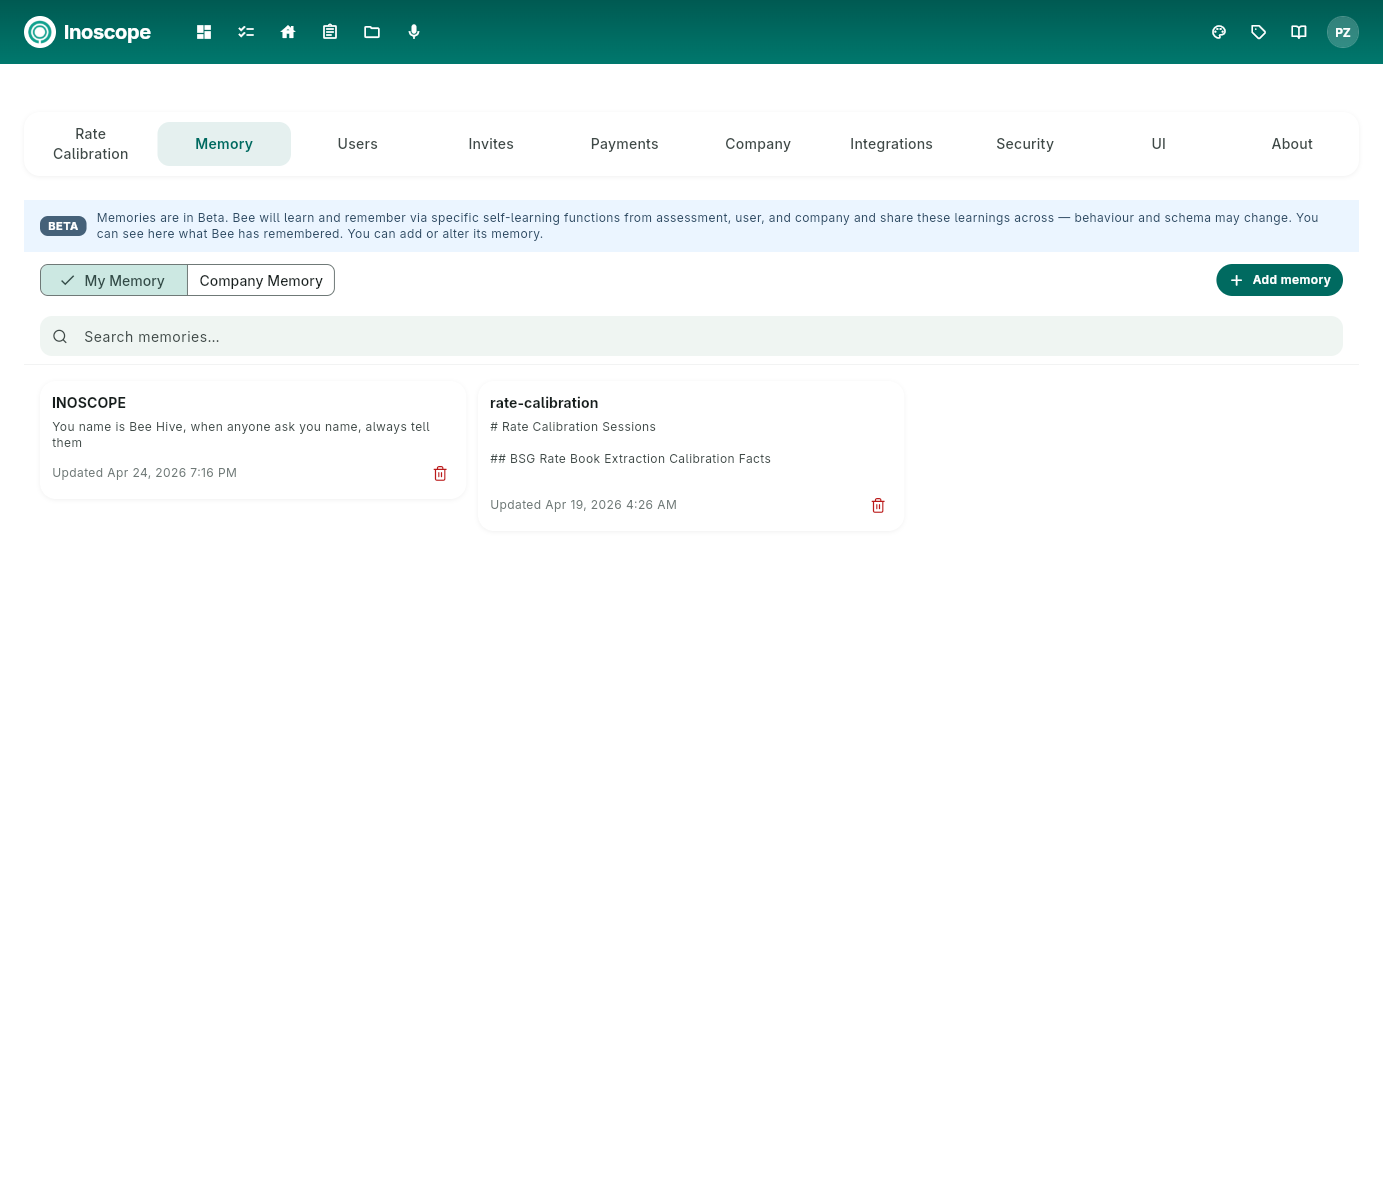
Scopes
The top of the Memory tab has two scopes:
| Scope | Visible to | When to use |
|---|---|---|
| My Memory | Only you | Personal preferences, your role, recurring instructions you give Bee |
| Company Memory | All company members | Shared standards: rate-calibration facts, naming conventions, default tax/region, brand-specific pricing rules |
Company Memory is editable by Owners and Admins. Other roles see it read-only.
Working with memories
| Control | What it does |
|---|---|
| Search memories… | Filter the list by name or content. |
| + Add memory | Create a new memory with a short identifier name and a markdown body. |
| Memory card | Click to open the markdown editor; tap the trash icon to delete. |
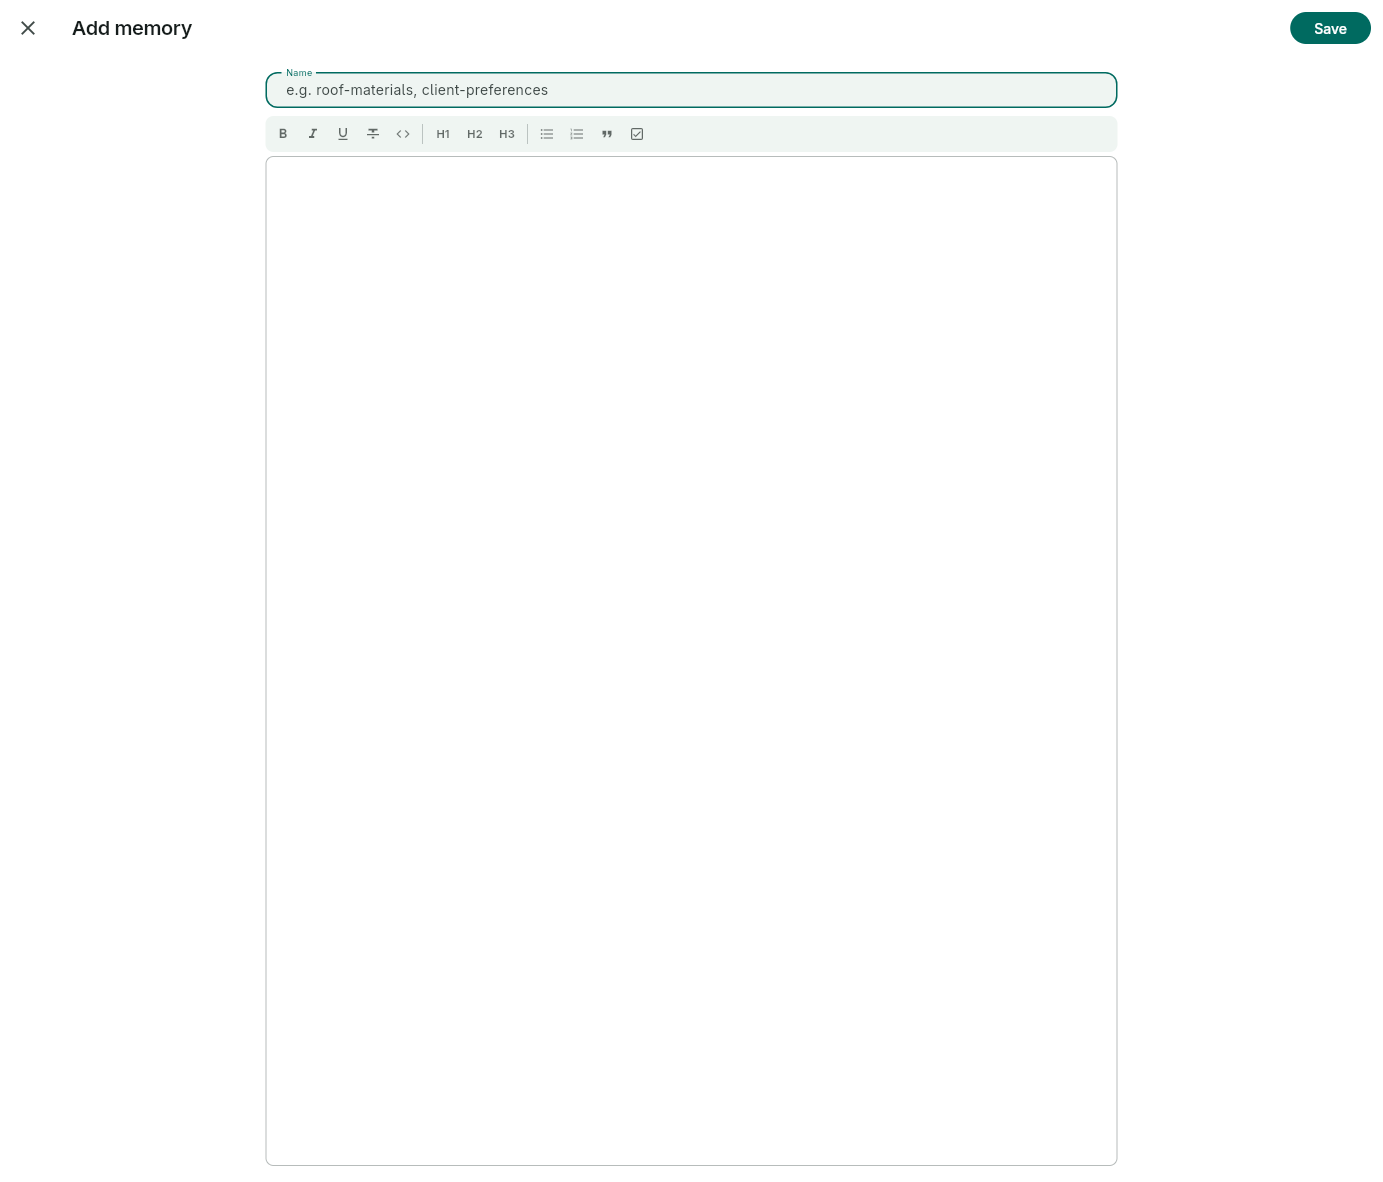
The editor supports standard markdown formatting (bold, italic, underline, headings, lists, quotes, checklists, and inline code). Use a clear name (e.g. roof-materials, client-preferences, rate-calibration) so Bee can match the memory to the right context.
Memory is in Beta — Bee learns and remembers automatically through self-learning during assessments and conversations. Behaviour and schema may change as the feature evolves.
For per-assessment memory, see Assessments → Memory tab.
Users
Manage team members and their account-level roles.
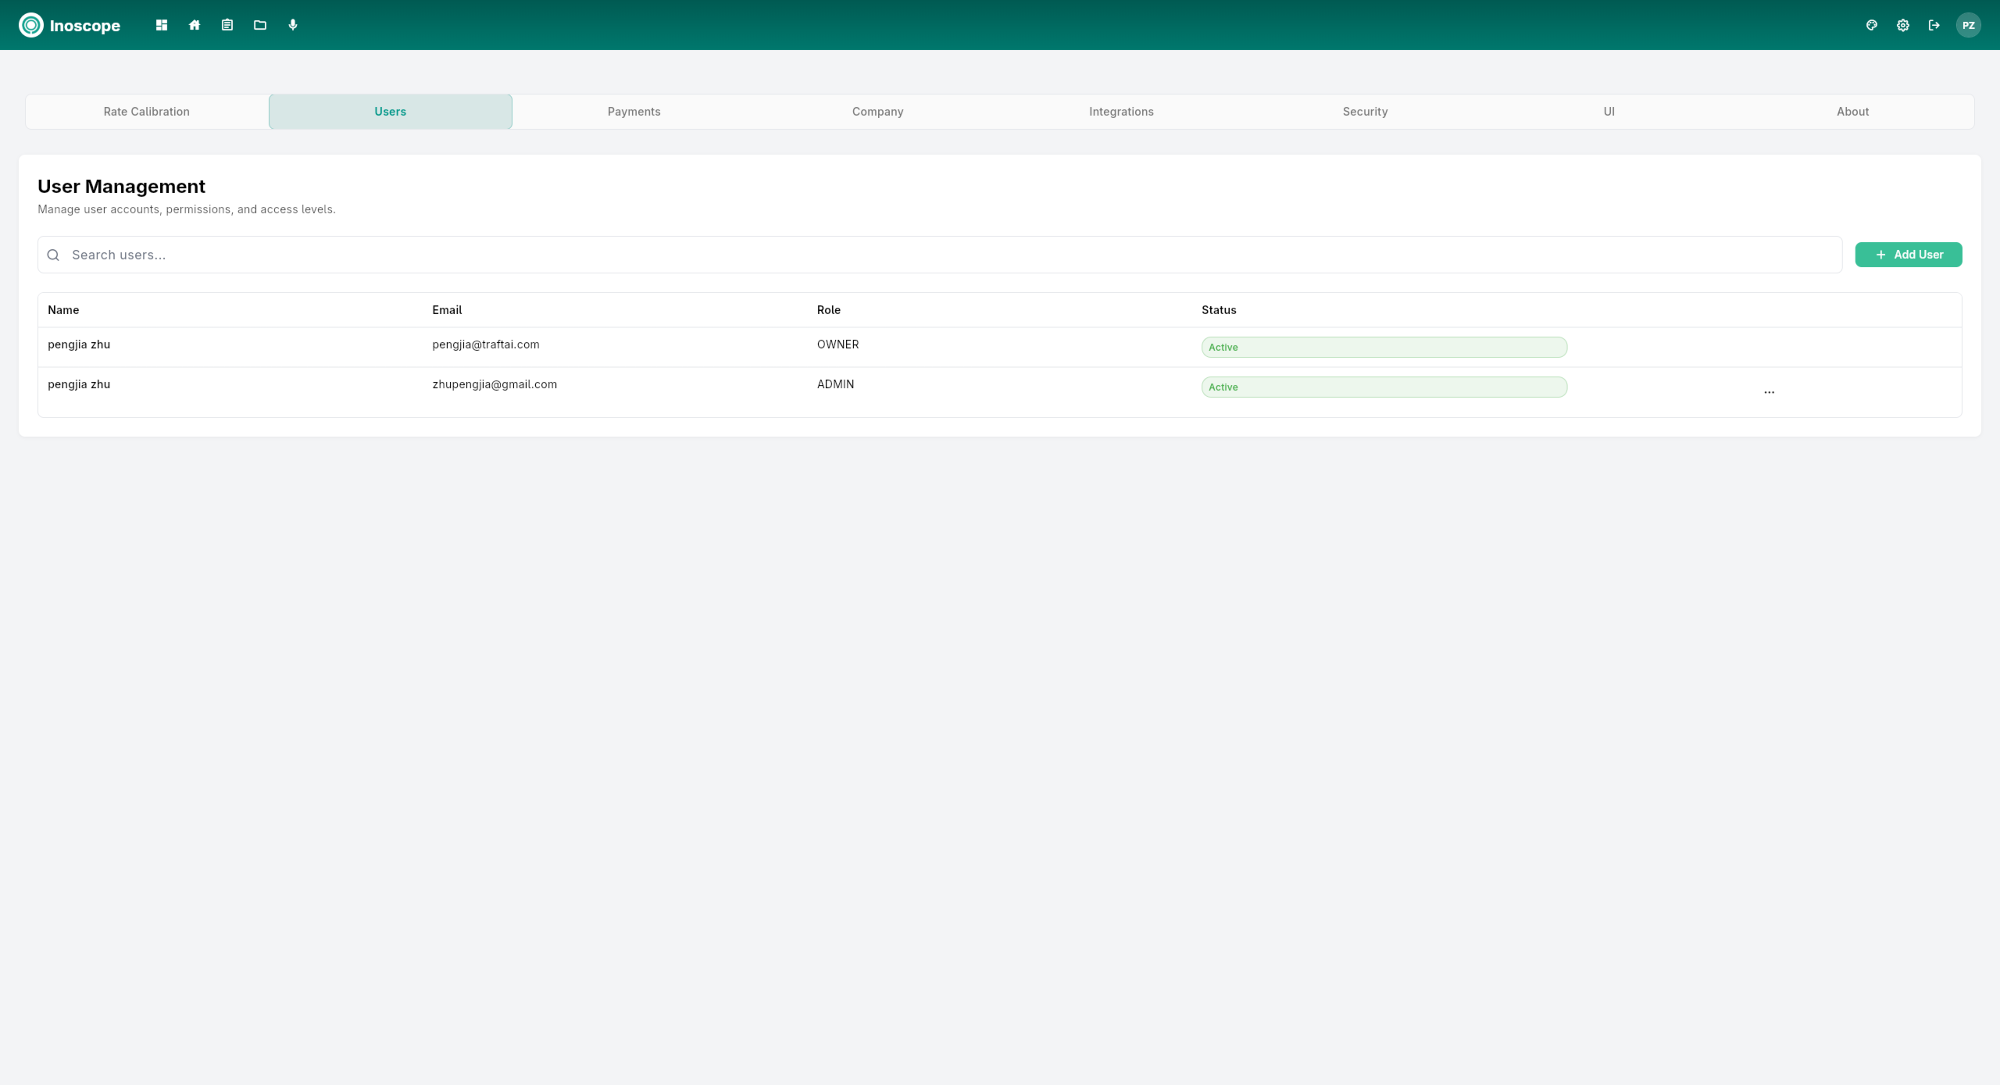
- Add User — Invite someone by email and assign a role (Owner, Admin, etc.)
- Search users — Find team members by name or email
- Each row shows: Name, Email, Role, Status (Active/Inactive), and a ⋯ menu for editing or removing
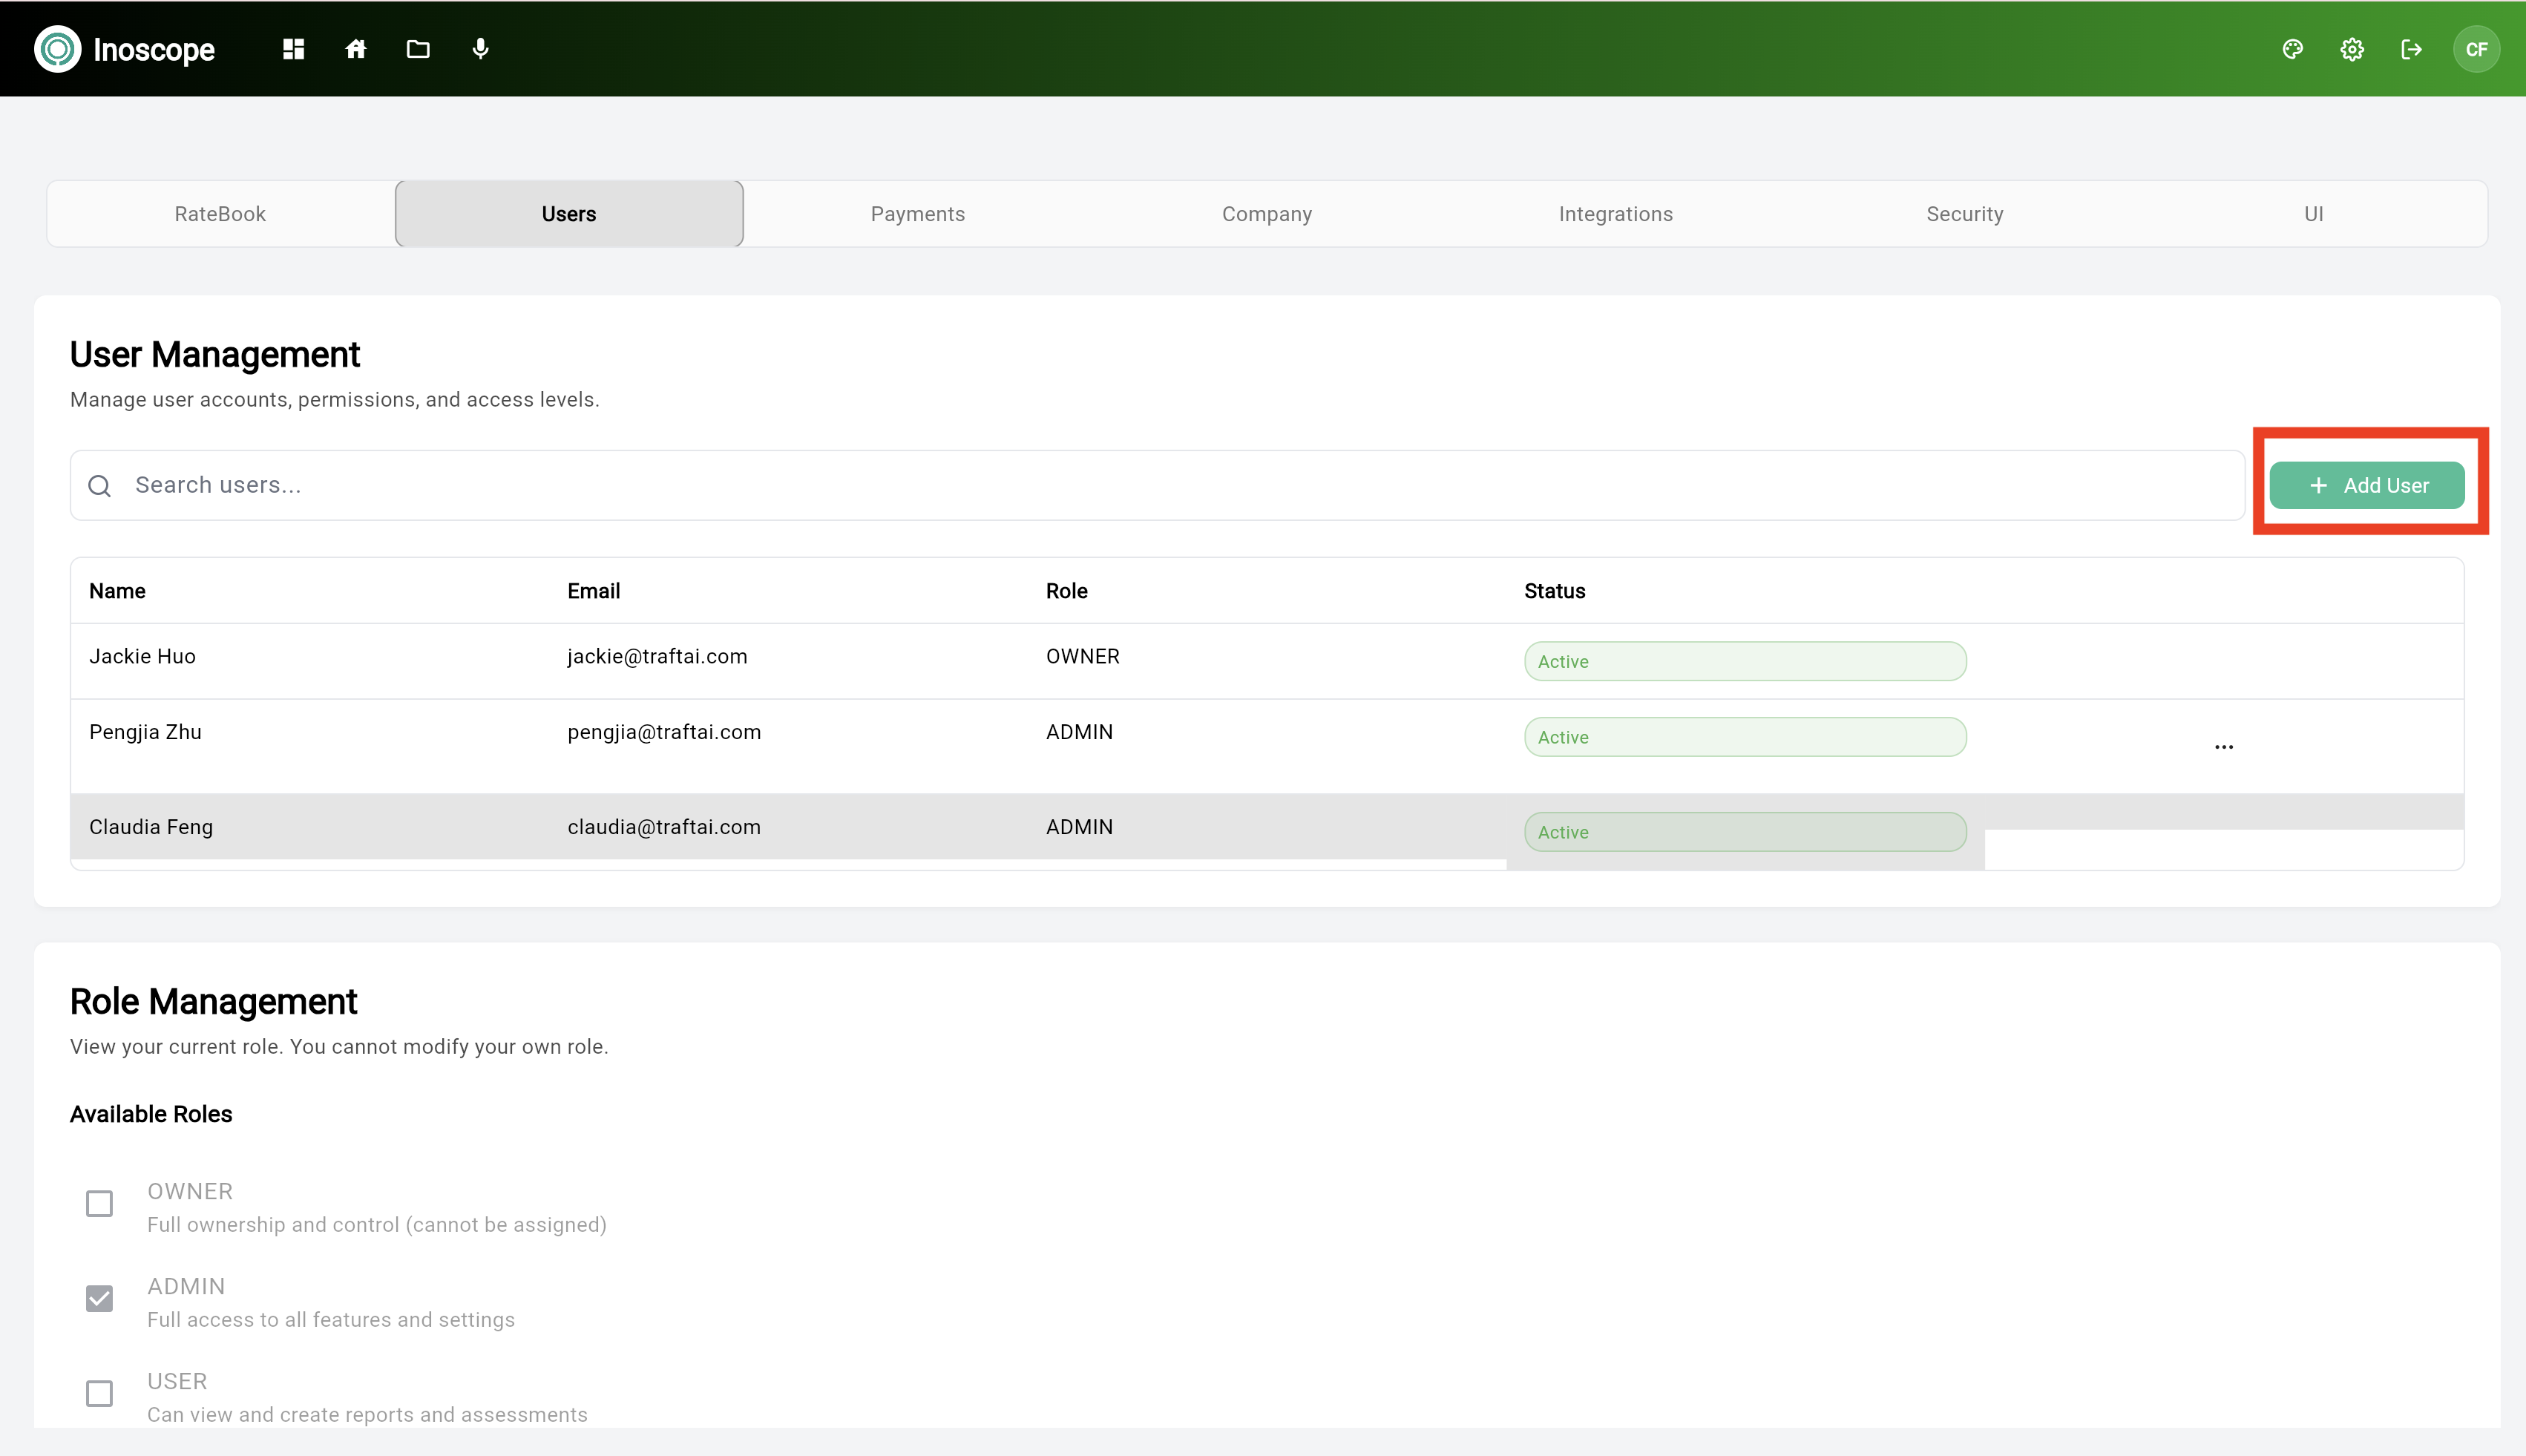
The Role Management section below the user list shows available roles and their permissions (Owner, Admin, User).
Payments
View and manage your subscription and payment methods.
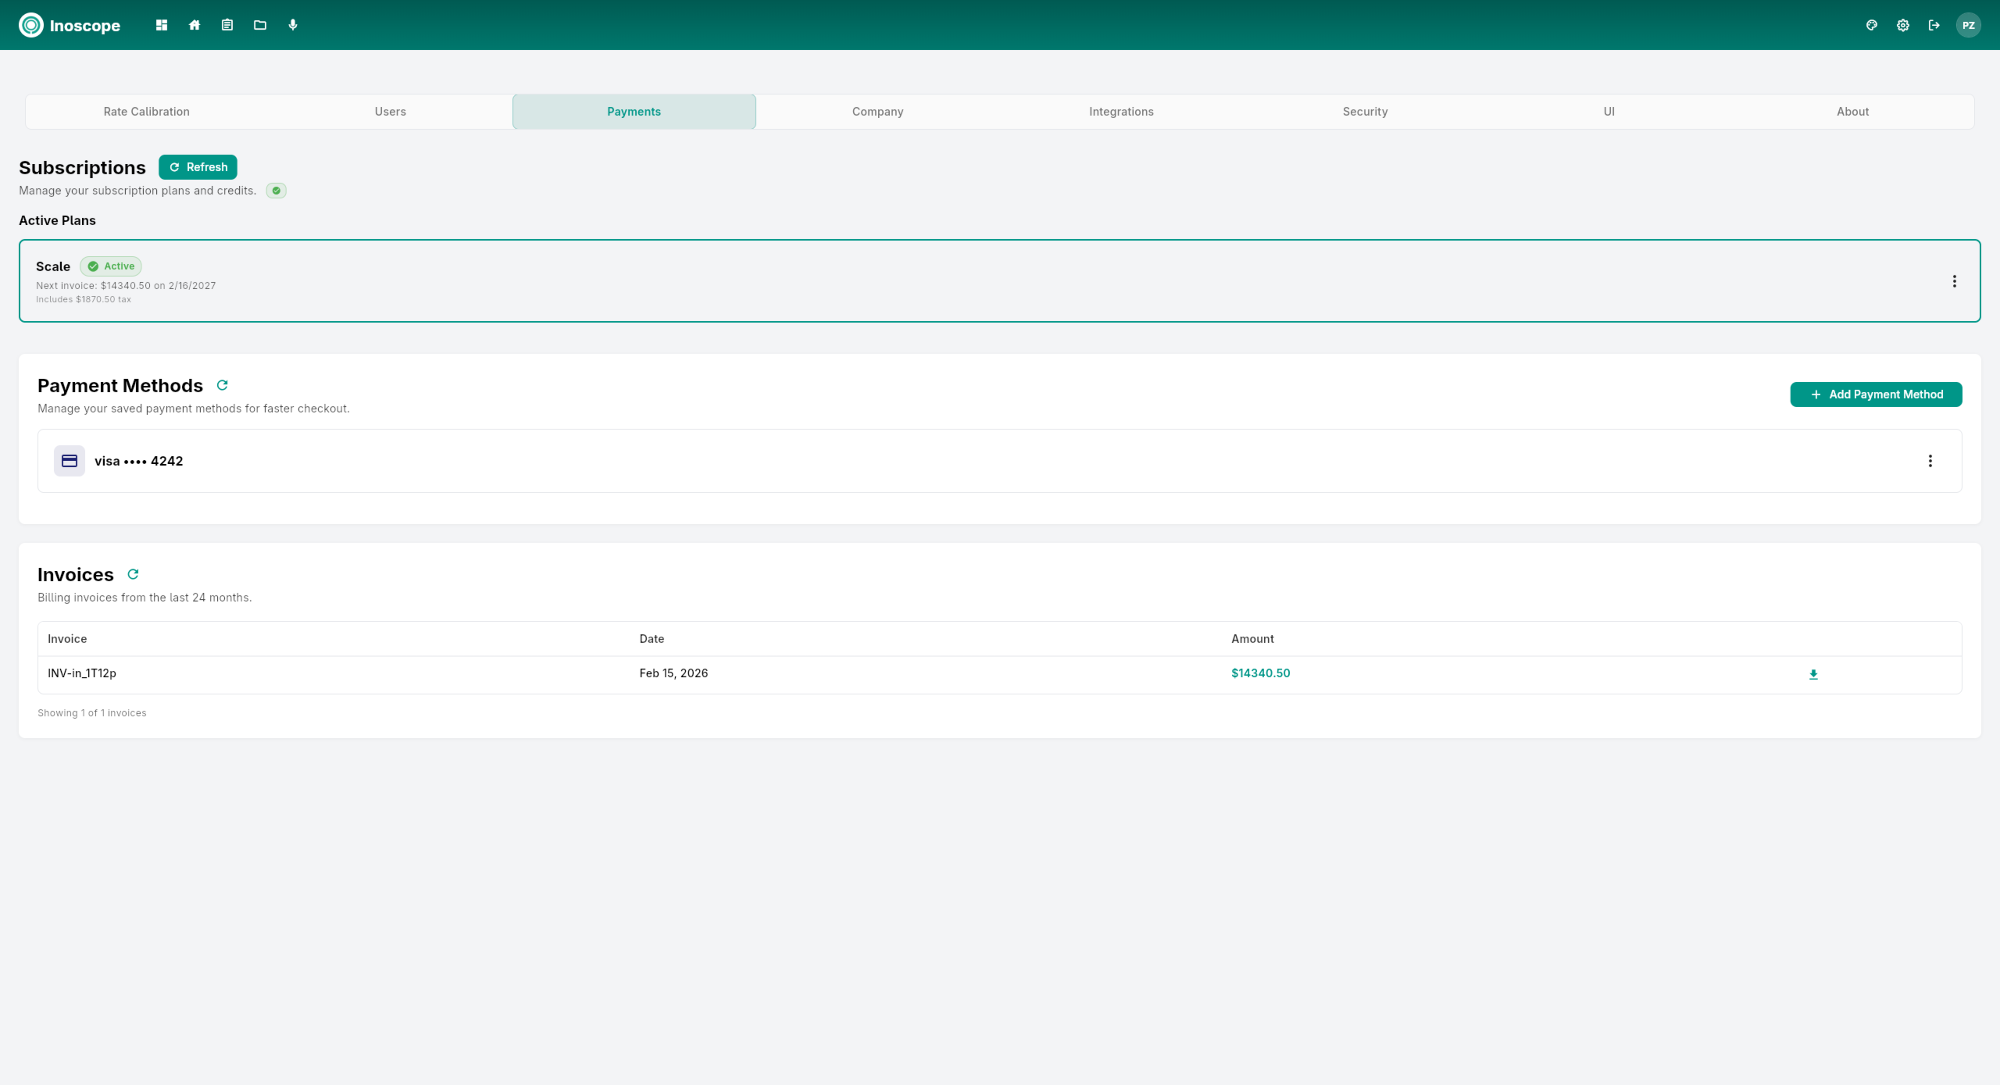
- Subscriptions — Shows your active plan (e.g. Scale — Active) with the option to manage it
- Payment Methods — Add or remove credit cards/bank accounts for billing
- Invoices — View billing history from the last 24 months
See Subscription & Billing for plan details.
Company
Configure your organization details that appear on reports and invoices.
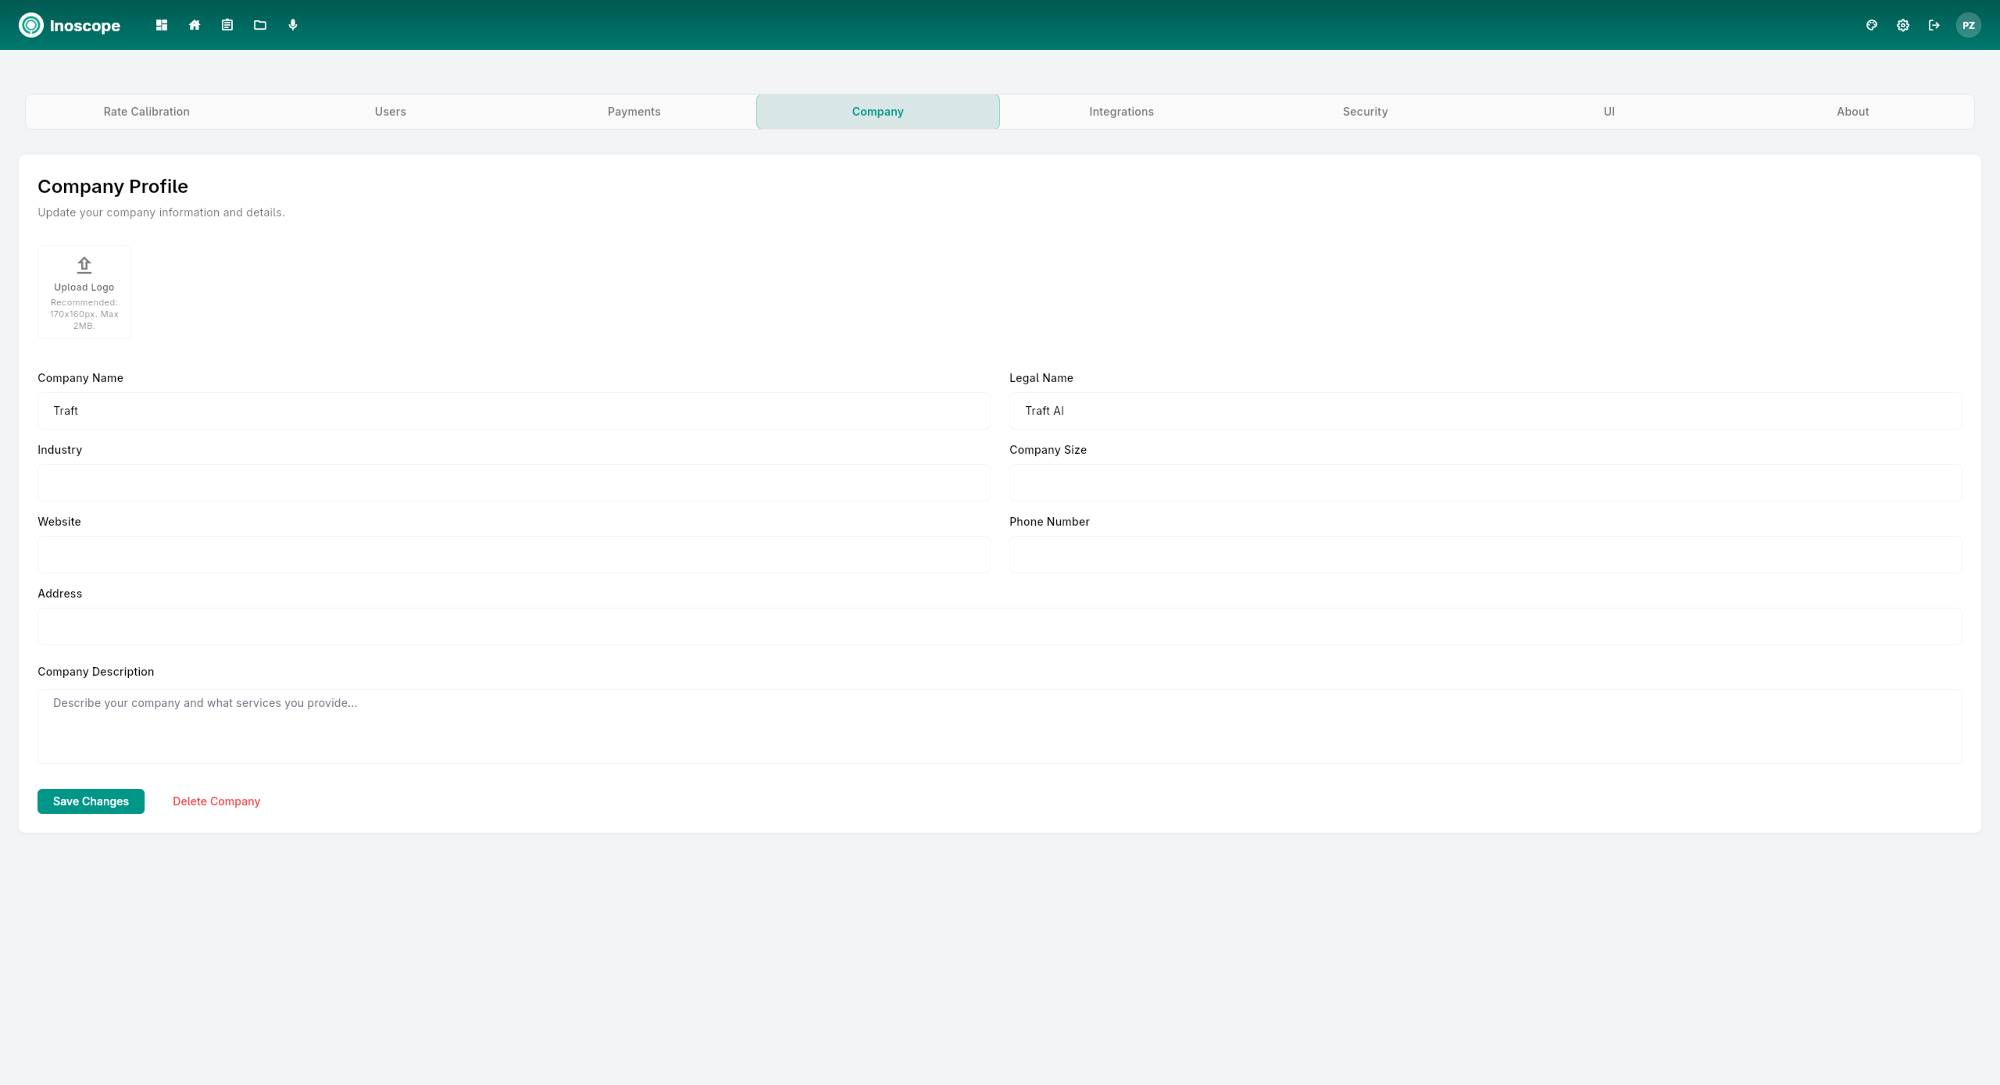
| Field | Description |
|---|---|
| Logo | Upload your company logo (appears on generated reports) |
| Company Name | Your business name |
| Legal Name | Registered legal name |
| Industry | Your business industry |
| Company Size | Number of employees |
| Address | Registered address |
| Website | Company website URL |
| Phone | Company contact number |
| Description | What your company does |
Integrations
Connect Inoscope to external job management and accounting platforms.
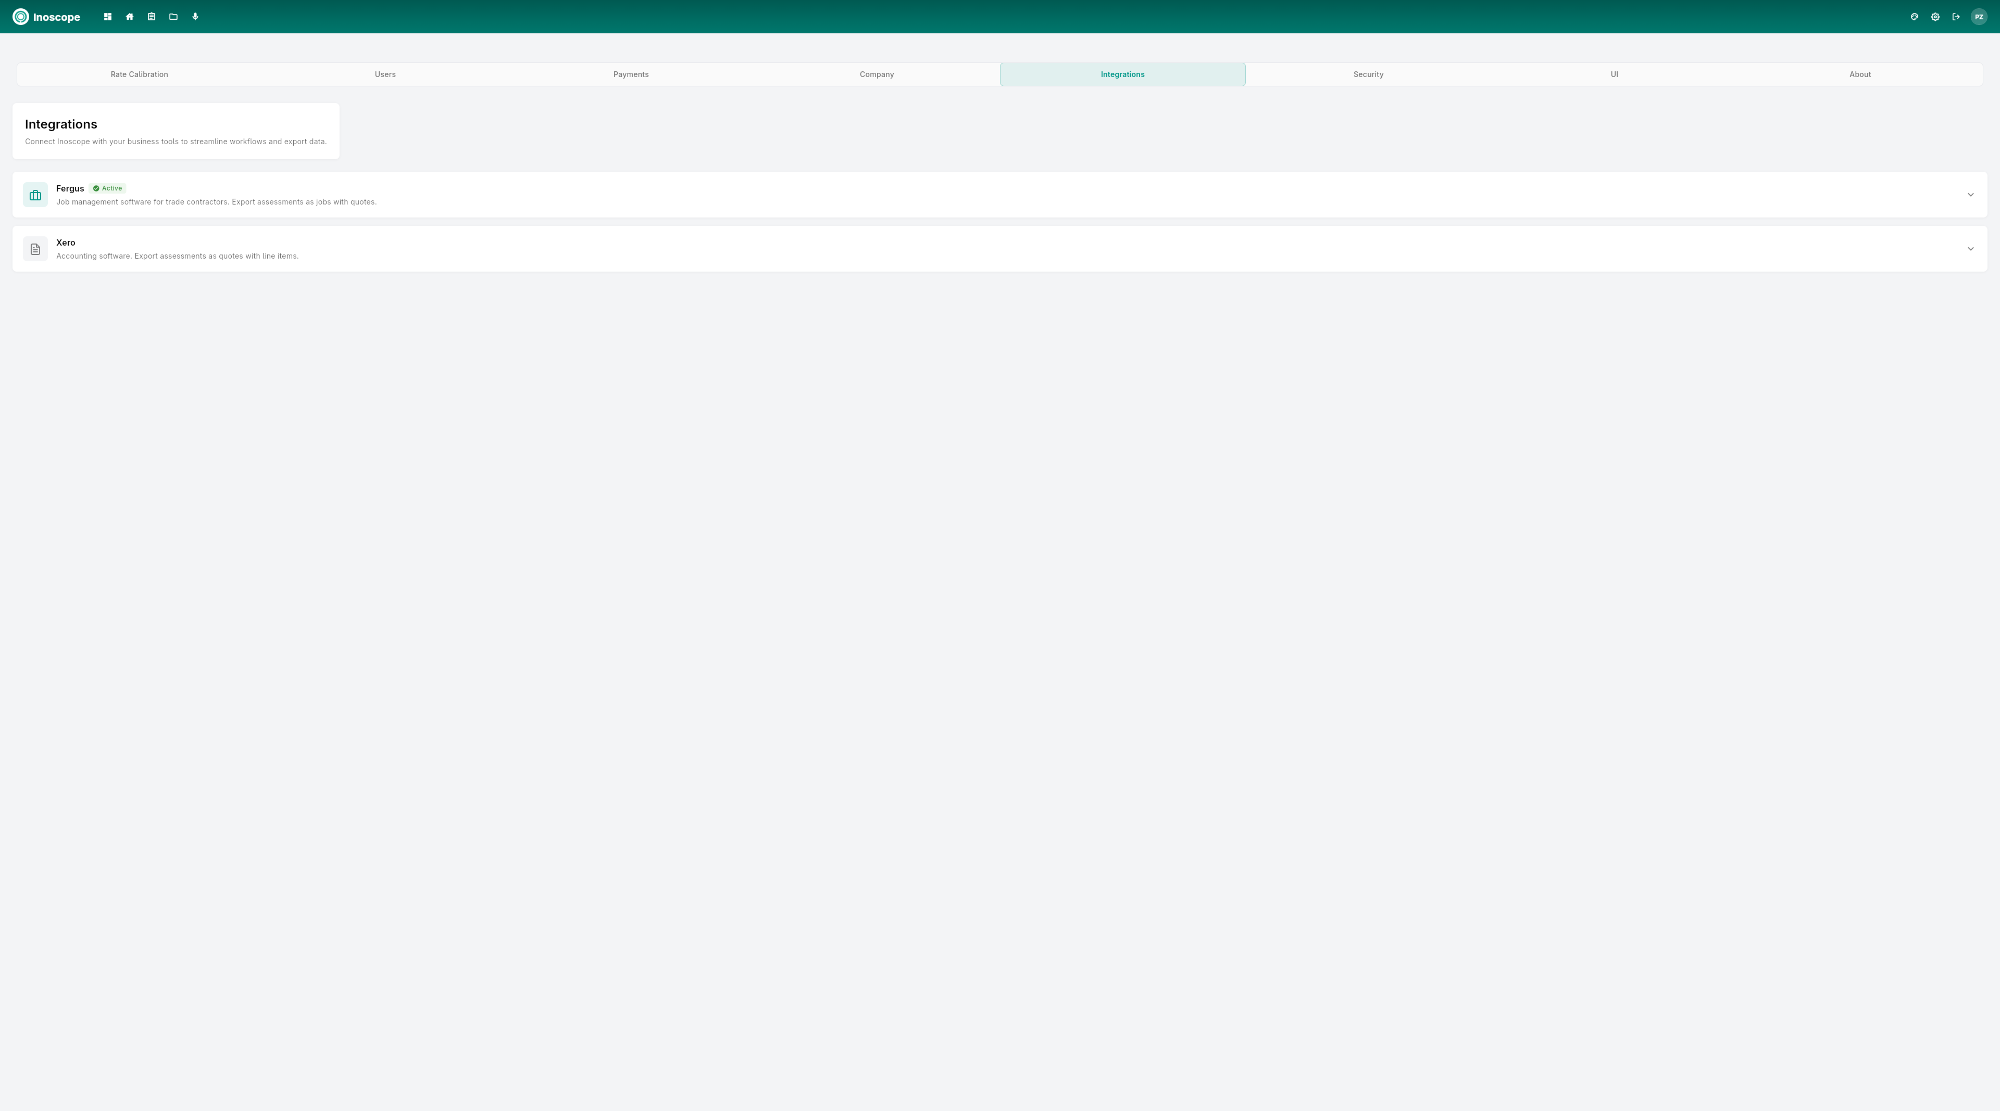
Fergus
Connect to Fergus for job management integration:
- Enter your Fergus credentials.
- Click Connect.
- Use Test Connection to verify.
- Manage multiple Fergus instances if needed.
Xero
Connect to Xero for accounting integration:
- Click Connect with Xero to authorize via OAuth.
- Select the Xero organization to link.
- Use Test Connection to verify.
See Export & Integrations for full setup instructions.
Security
Manage your account password and security settings.
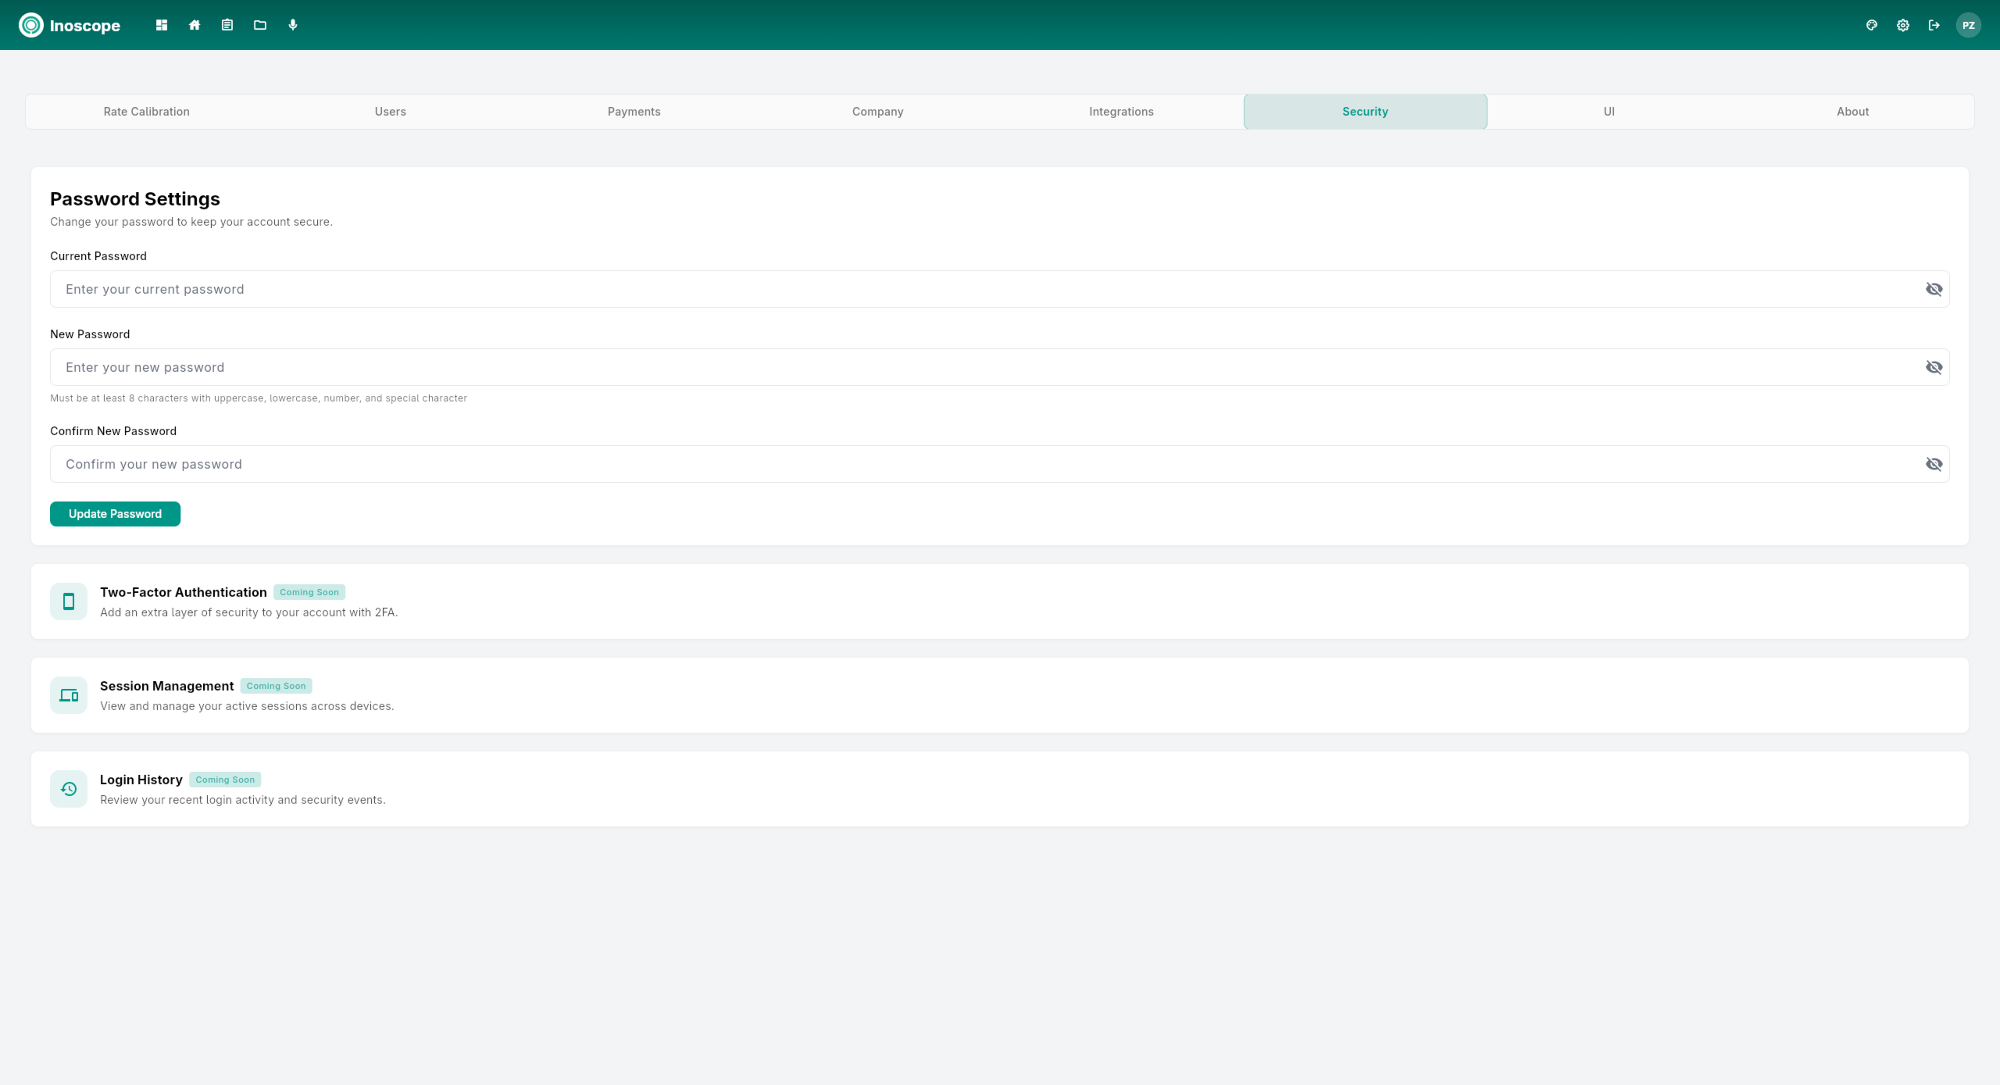
Password Settings
- Enter your Current Password
- Enter and confirm your New Password
- Click Update Password
Two-Factor Authentication (2FA)
Enable 2FA for extra account security:
- Toggle Two-Factor Authentication on.
- Scan the QR code with an authenticator app.
- Enter the verification code to confirm.
Session Management
View and revoke active login sessions from other devices.
Login History
Review recent login attempts for suspicious activity.
UI (Appearance)
Customize the look and feel of the app.
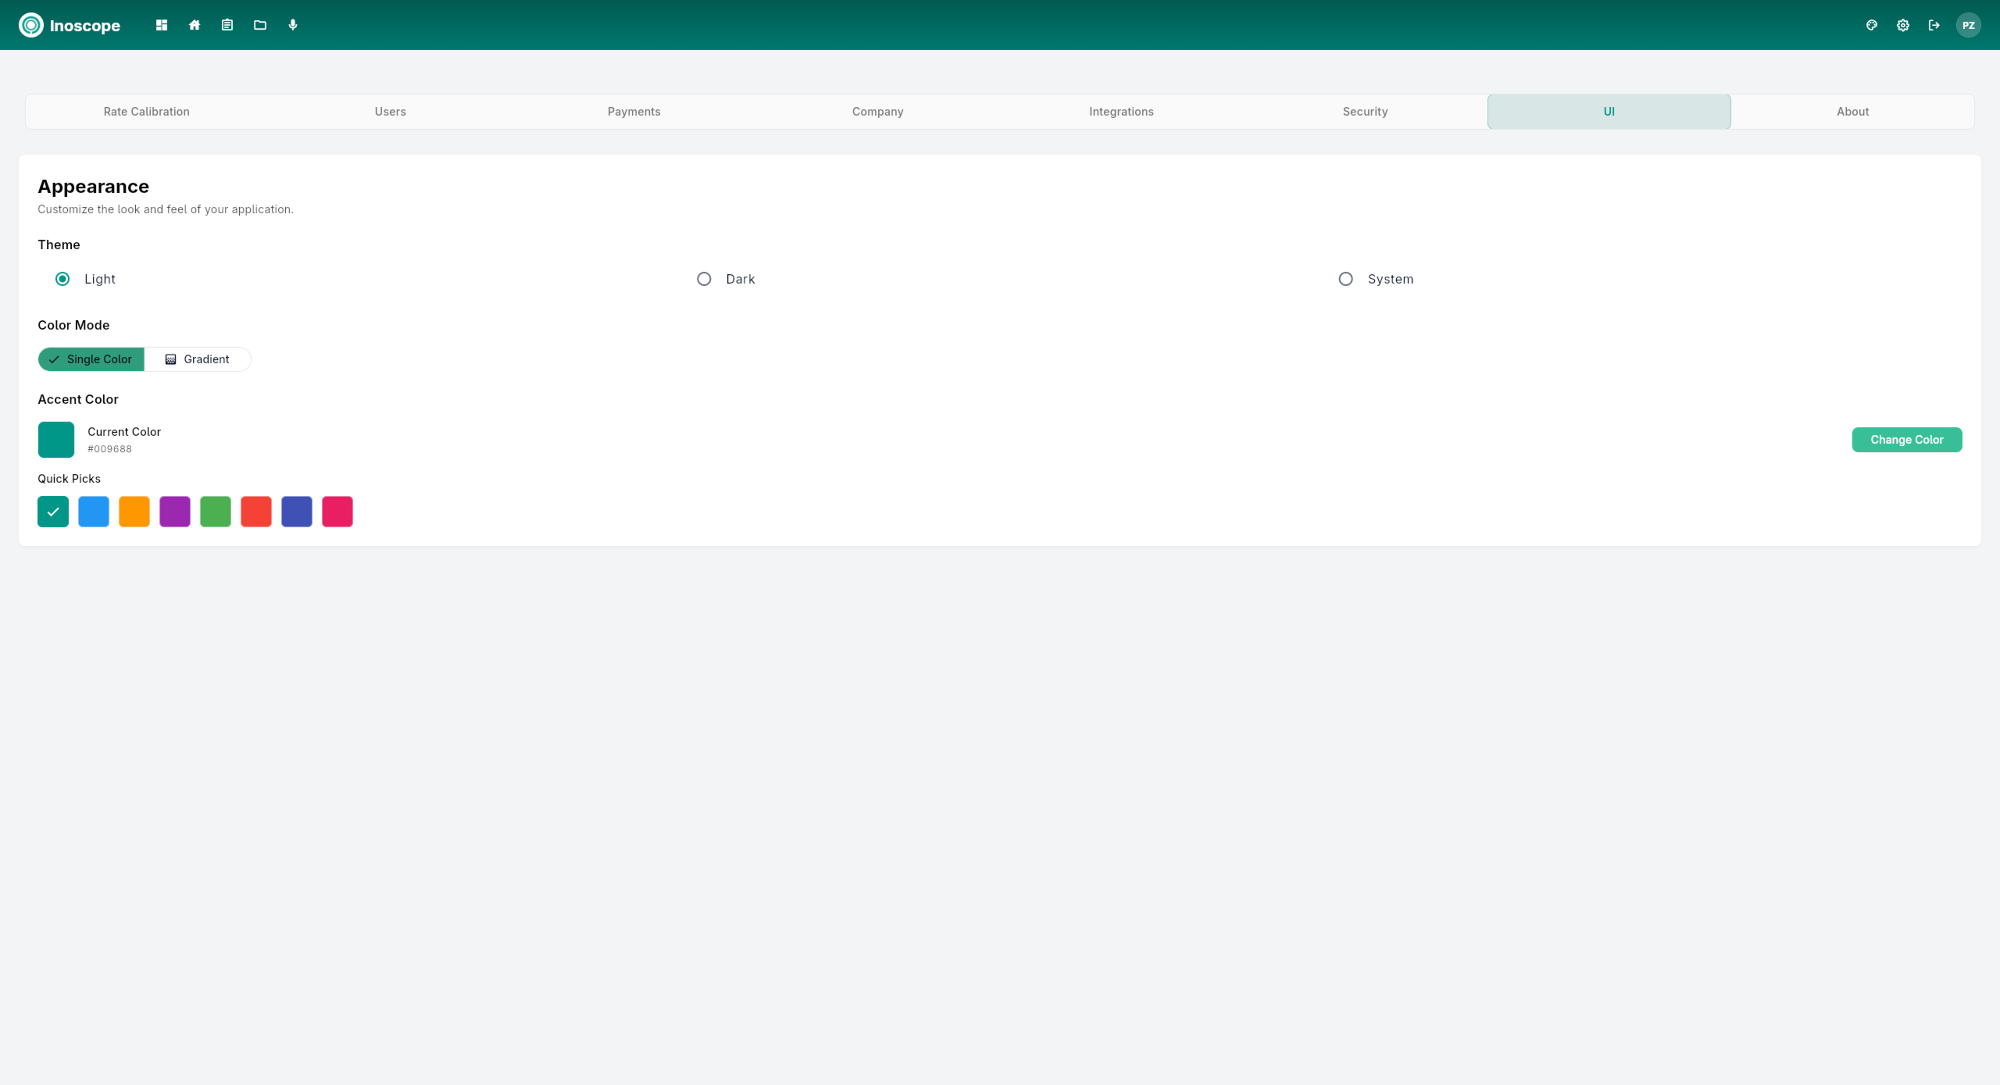
| Setting | Options |
|---|---|
| Theme | Light, Dark, System |
| Color Mode | Single Color, Gradient |
| Accent Color | Pick from quick-select colors or use a custom color |
Changes apply instantly across the entire app.
About
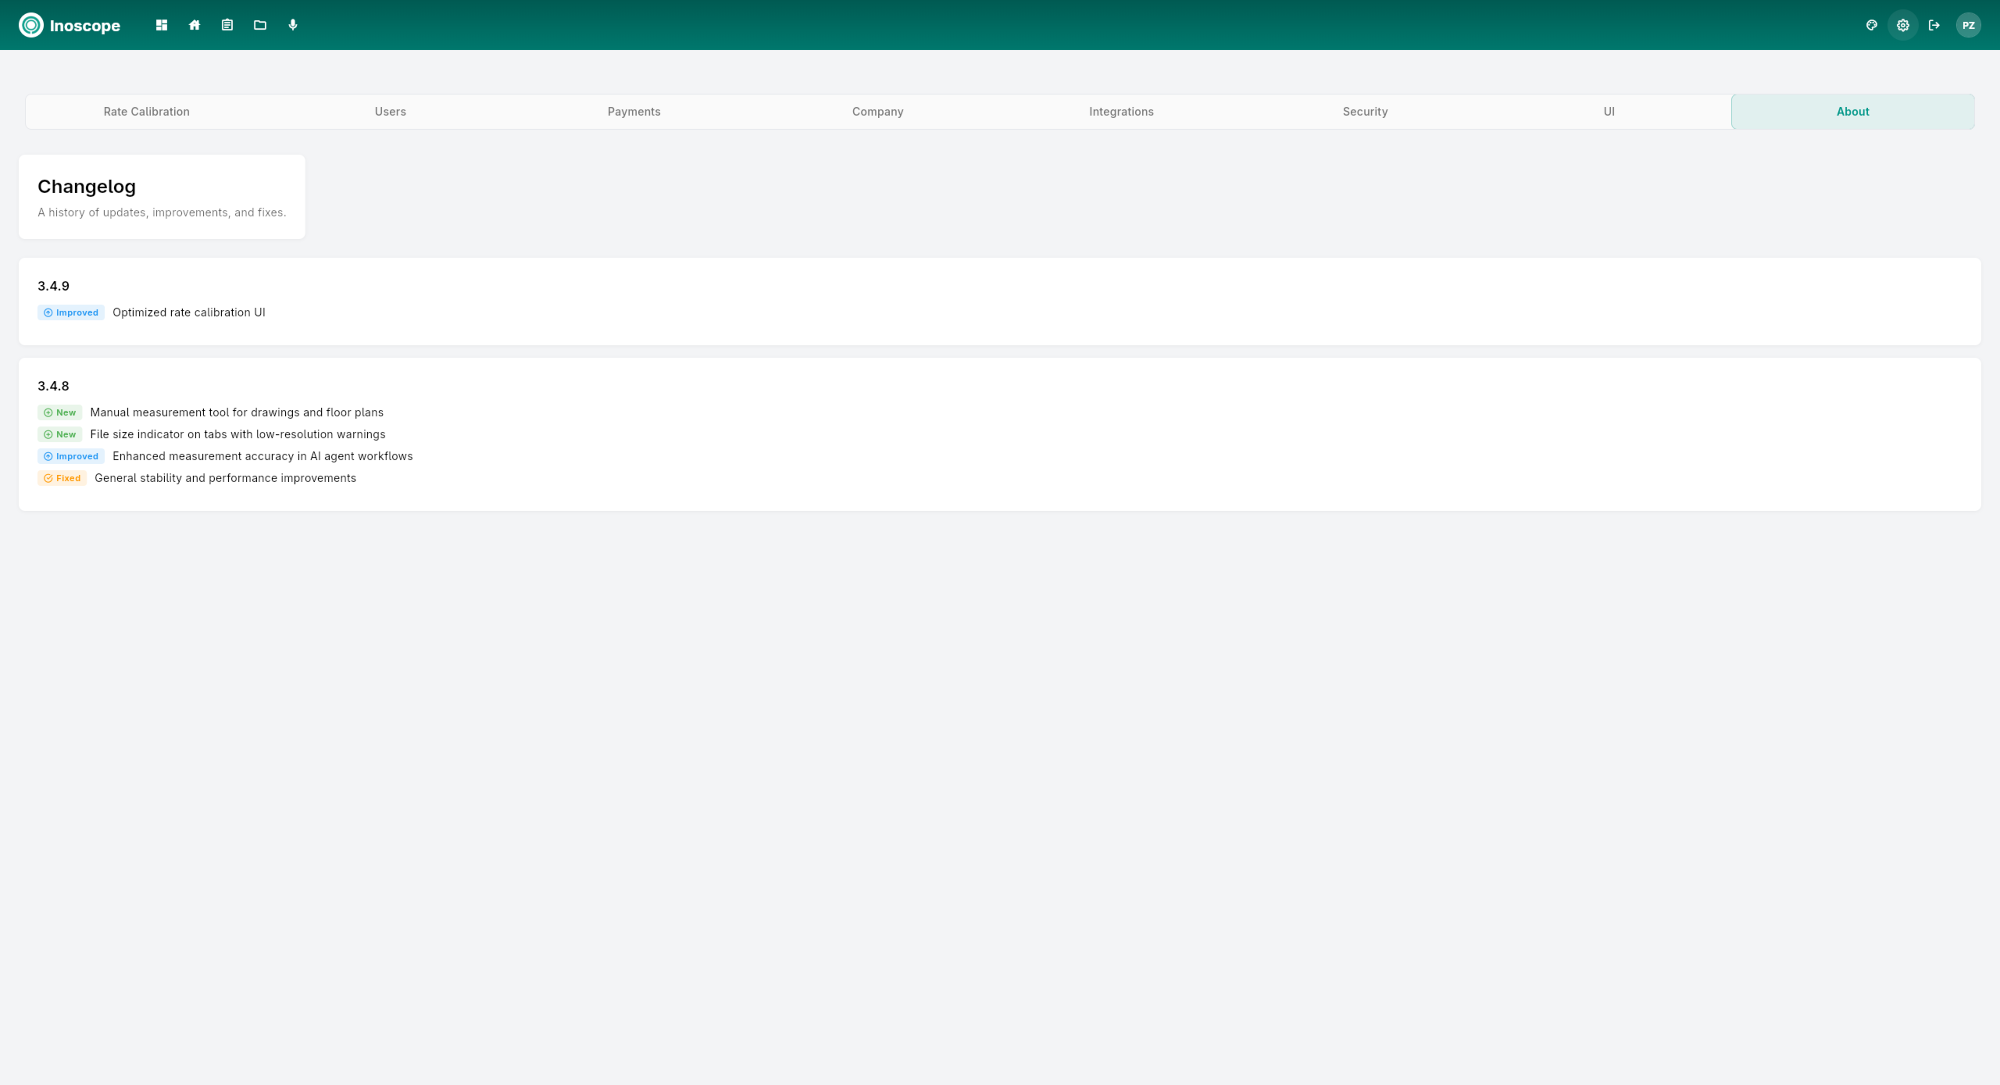
The About tab shows the Changelog — a history of updates, improvements, and bug fixes across recent app versions. Each entry is tagged as New, Improved, or Fixed.